Loading...
Loading...
Loading...
Loading...
Loading...
Loading...
Loading...
Loading...
Loading...
Loading...
Loading...
Loading...
Loading...
Loading...
Loading...
Loading...
Loading...
Loading...
Loading...
Loading...
Loading...
Loading...
Loading...
Loading...
3rd party attribution sources integration
devtodev has integration with the following attribution trackers:
If there is no tracker you are using in the list - you can send data via Custom postback API.
In devtodev:
Add Singular API key to receive CPI information.
The Singular API Key and App name can be found in the Singular Console.
In Singular:
Set up a devtodev partner integration in Attribution -> Partner Configuration according to the instruction.
We created special custom postback API endpoint to allow our customers integrate trackers we have not impemented yet. Also you can use this API to transfer data about attribution from your own server if you have such data.
You need your project's API Key which can be obtained by going to 'Settings -> SDK -> Integration' section in Application menu.
The endpoint accepts request in either GET or POST form. Examples:
string: ordinary text string
uuid: identifiers with following format 0123456789ab-cdef-0123-456789abcde
country: ISO 3166-1 alpha-2
number: float number (99.99)
Field
Type
Required
Description
install_timestamp
time
optional
Install time, defaults to event time
click_timestamp
time
optional
Click time, defaults to install time
publisher_name
string
required
Source
campaign_name
string
optional
Campaign
campaign_id
string
optional
Campaign identifier
country_code
ISO 3166-1 alpha-2
optional
Country
s_publisher_name
string
optional
Sub-publisher
s_publisher
string
optional
Sub-publisher identifier
s_site_name
string
optional
Sub-site
s_site
string
optional
Sub-site identifier
s_adgroup_name
string
optional
Sub-ad group
s_adgroup
string
optional
Sub-ad group identifier
s_ad_name
string
optional
Sub-ad
s_ad
string
optional
Sub-ad identifier
s_keyword_name
string
optional
Keyword
s_placement_name
string
optional
Placement
device_model
string
optional
Device model
device_brand
string
optional
Device brand
event_name
string
fixed value
I.e. install
cost
number, USD
optional
Cost per install (CPI)
id
string
optional
Unique install identifier usually used by trackers to prevent duplicate installs (if exists)
At least one of the following identifiers should exist in request:
ios_ifa
uuid
at least one
ios_ifv
uuid
at least one
os_id
string
at least one
google_aid
uuid
at least one
windows_aid
uuid
at least one
user_id
string
at least one
Copy devtodev API key from “3rd Party Attribution. AppsFlyer” panel on " Settings -> 3rd party sources -> Attribution trackers" page in devtodev system. Don't forget to turn on the service.
Sign in with AppsFlyer.
Open the devtodev Tech Partner integration page and start manage integration.
Select your app, paste the devtodev API key you copied before, select "All media sources, including organic", activate partner and click "Save integration". Integration completed.
For iOS applications we recommend turning off the Advanced Privacy (for iOS 14.5+ and later) option.
To improve the synchronization of the user data obtained by devtodev with the install data from AppsFlyer, we recommend that you follow the guideline below. The following recommendation is especially important for iOS since Advertising ID (IDFA) is no longer always available, and Vendor ID (IDFV) is not always sent by AppsFlyer. The best solution here is to send AppsFlyer’s user ID data to devtodev.
You need to make some changes to the devtodev SDK integration. You need to send a string parameter named "ad_tracker_id" to the user profile custom property while assigning to its value an AppsFlyer ID, which can be obtained from AppsFlyer SDK.
If you have multiple mobile apps for which you would like to set up this integration, you will need to follow these steps for each one of your mobile apps individually.
devtodev allows our customers to query CPI data from AppsFlyer via Pull API.
AppsFlyer has API daily rate limits, so adding CPI integration results in a single daily request per app.
Integration can be enabled by checking the appropriate box. You will need an API token V.2.0, which can be found on the Profile -> Security Center -> API tokens page. For Apple platform App ID is Application ID without the 'id' prefix. For Android platform App ID is Android Package name. Note: App IDs are case sensitive.
1 .Log in to Tenjin.
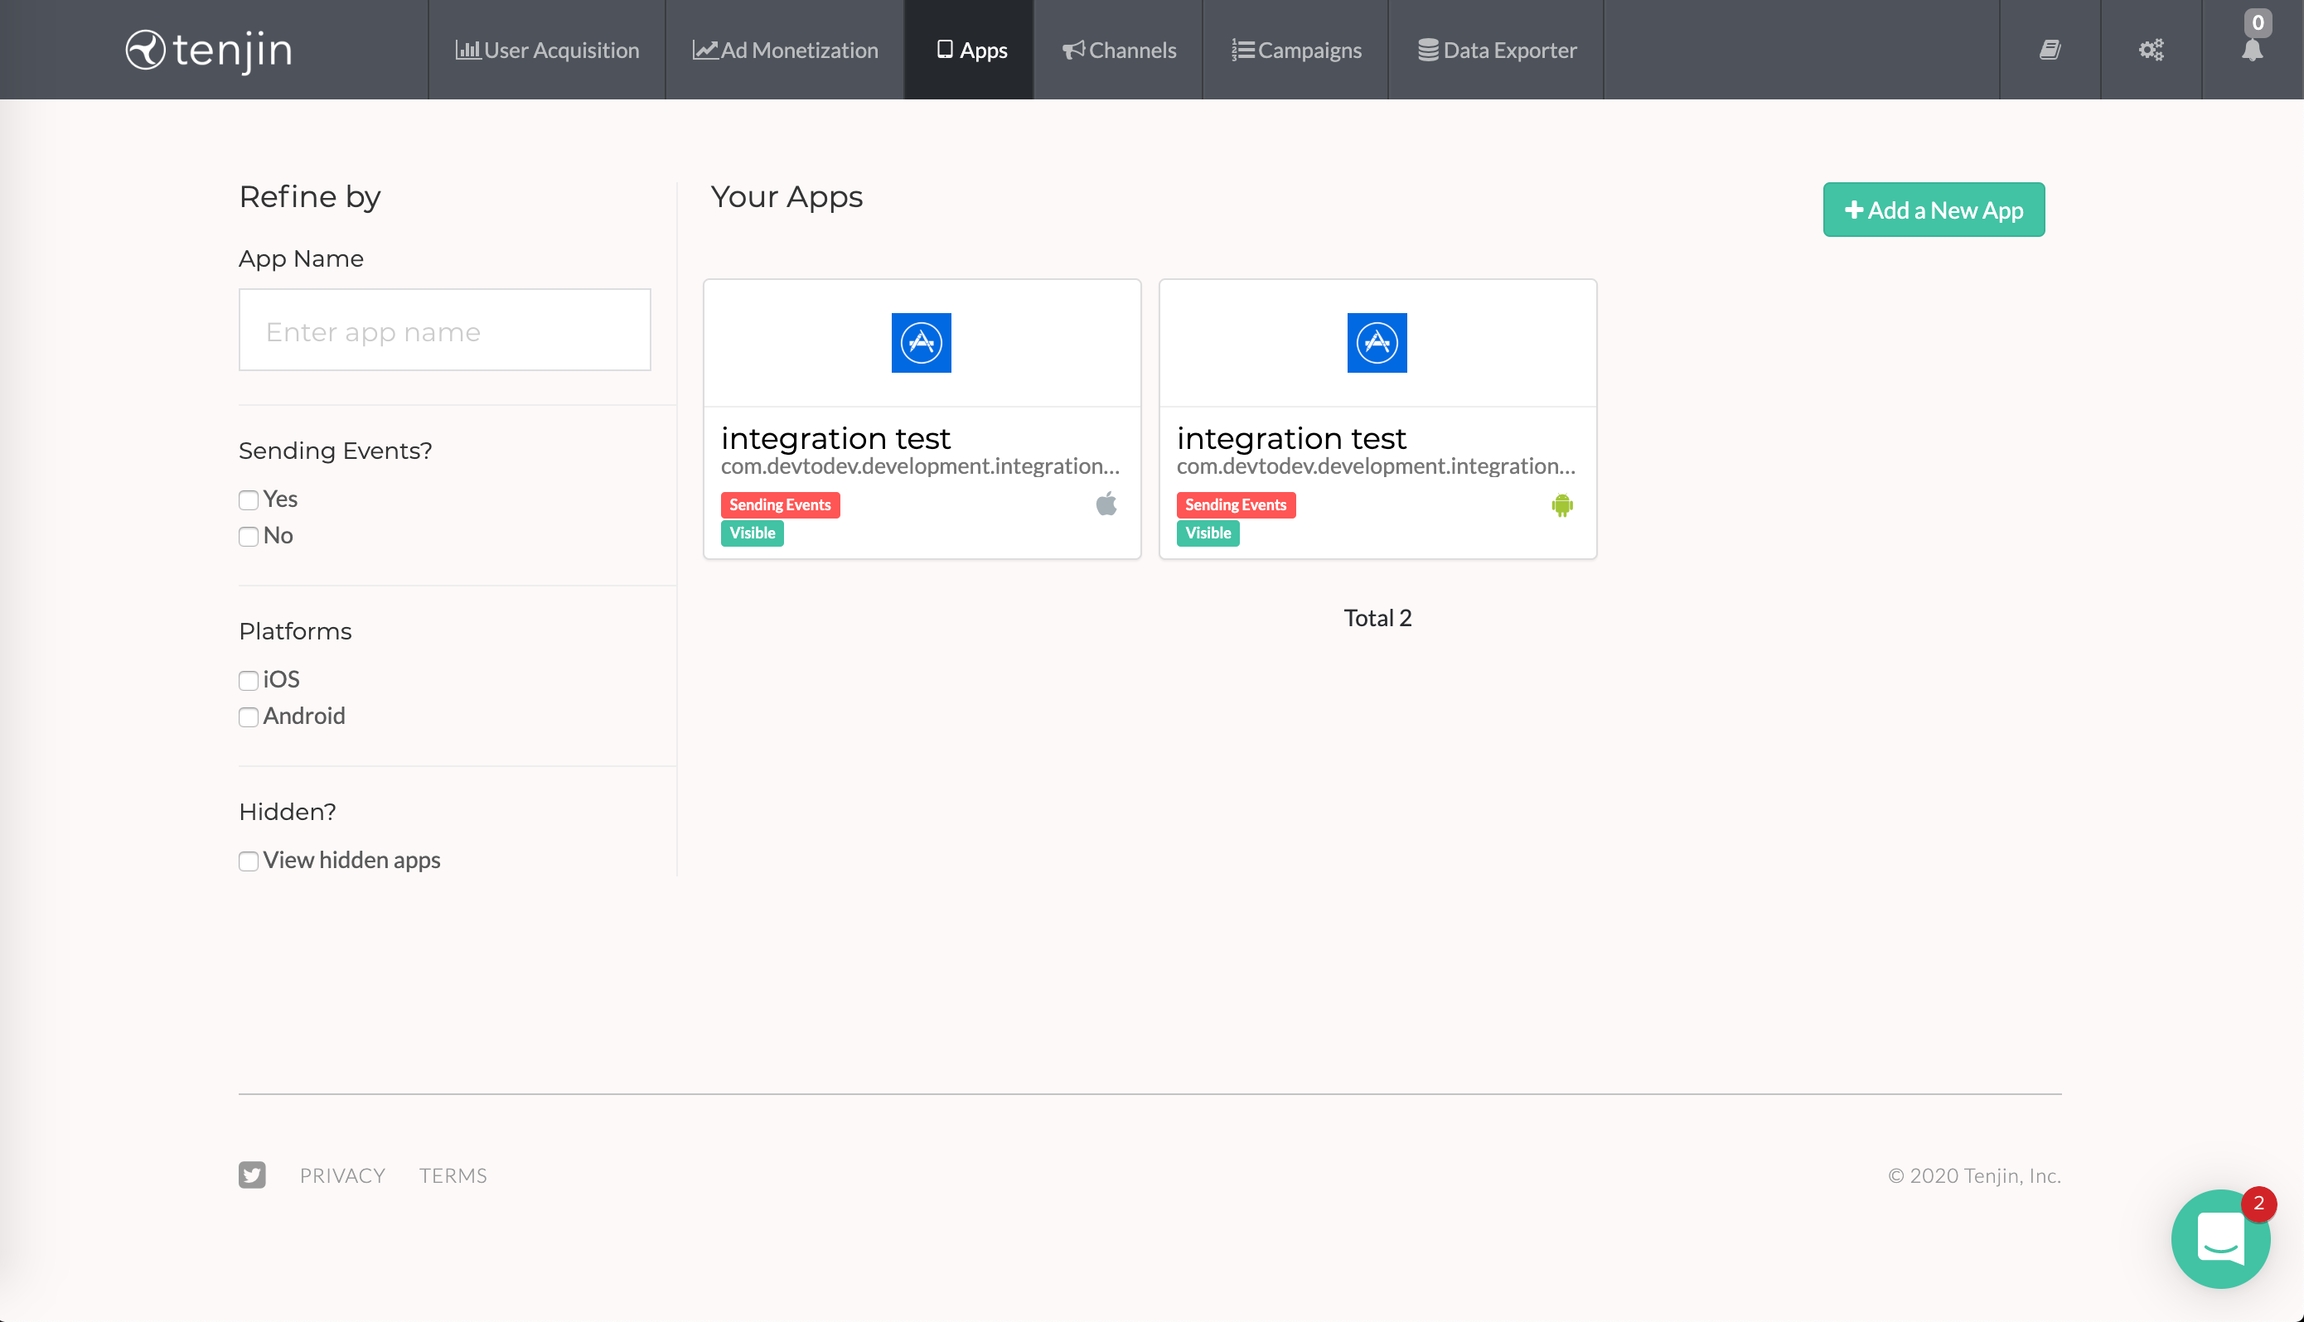
2. Go to the 'Apps' section in the top menu.
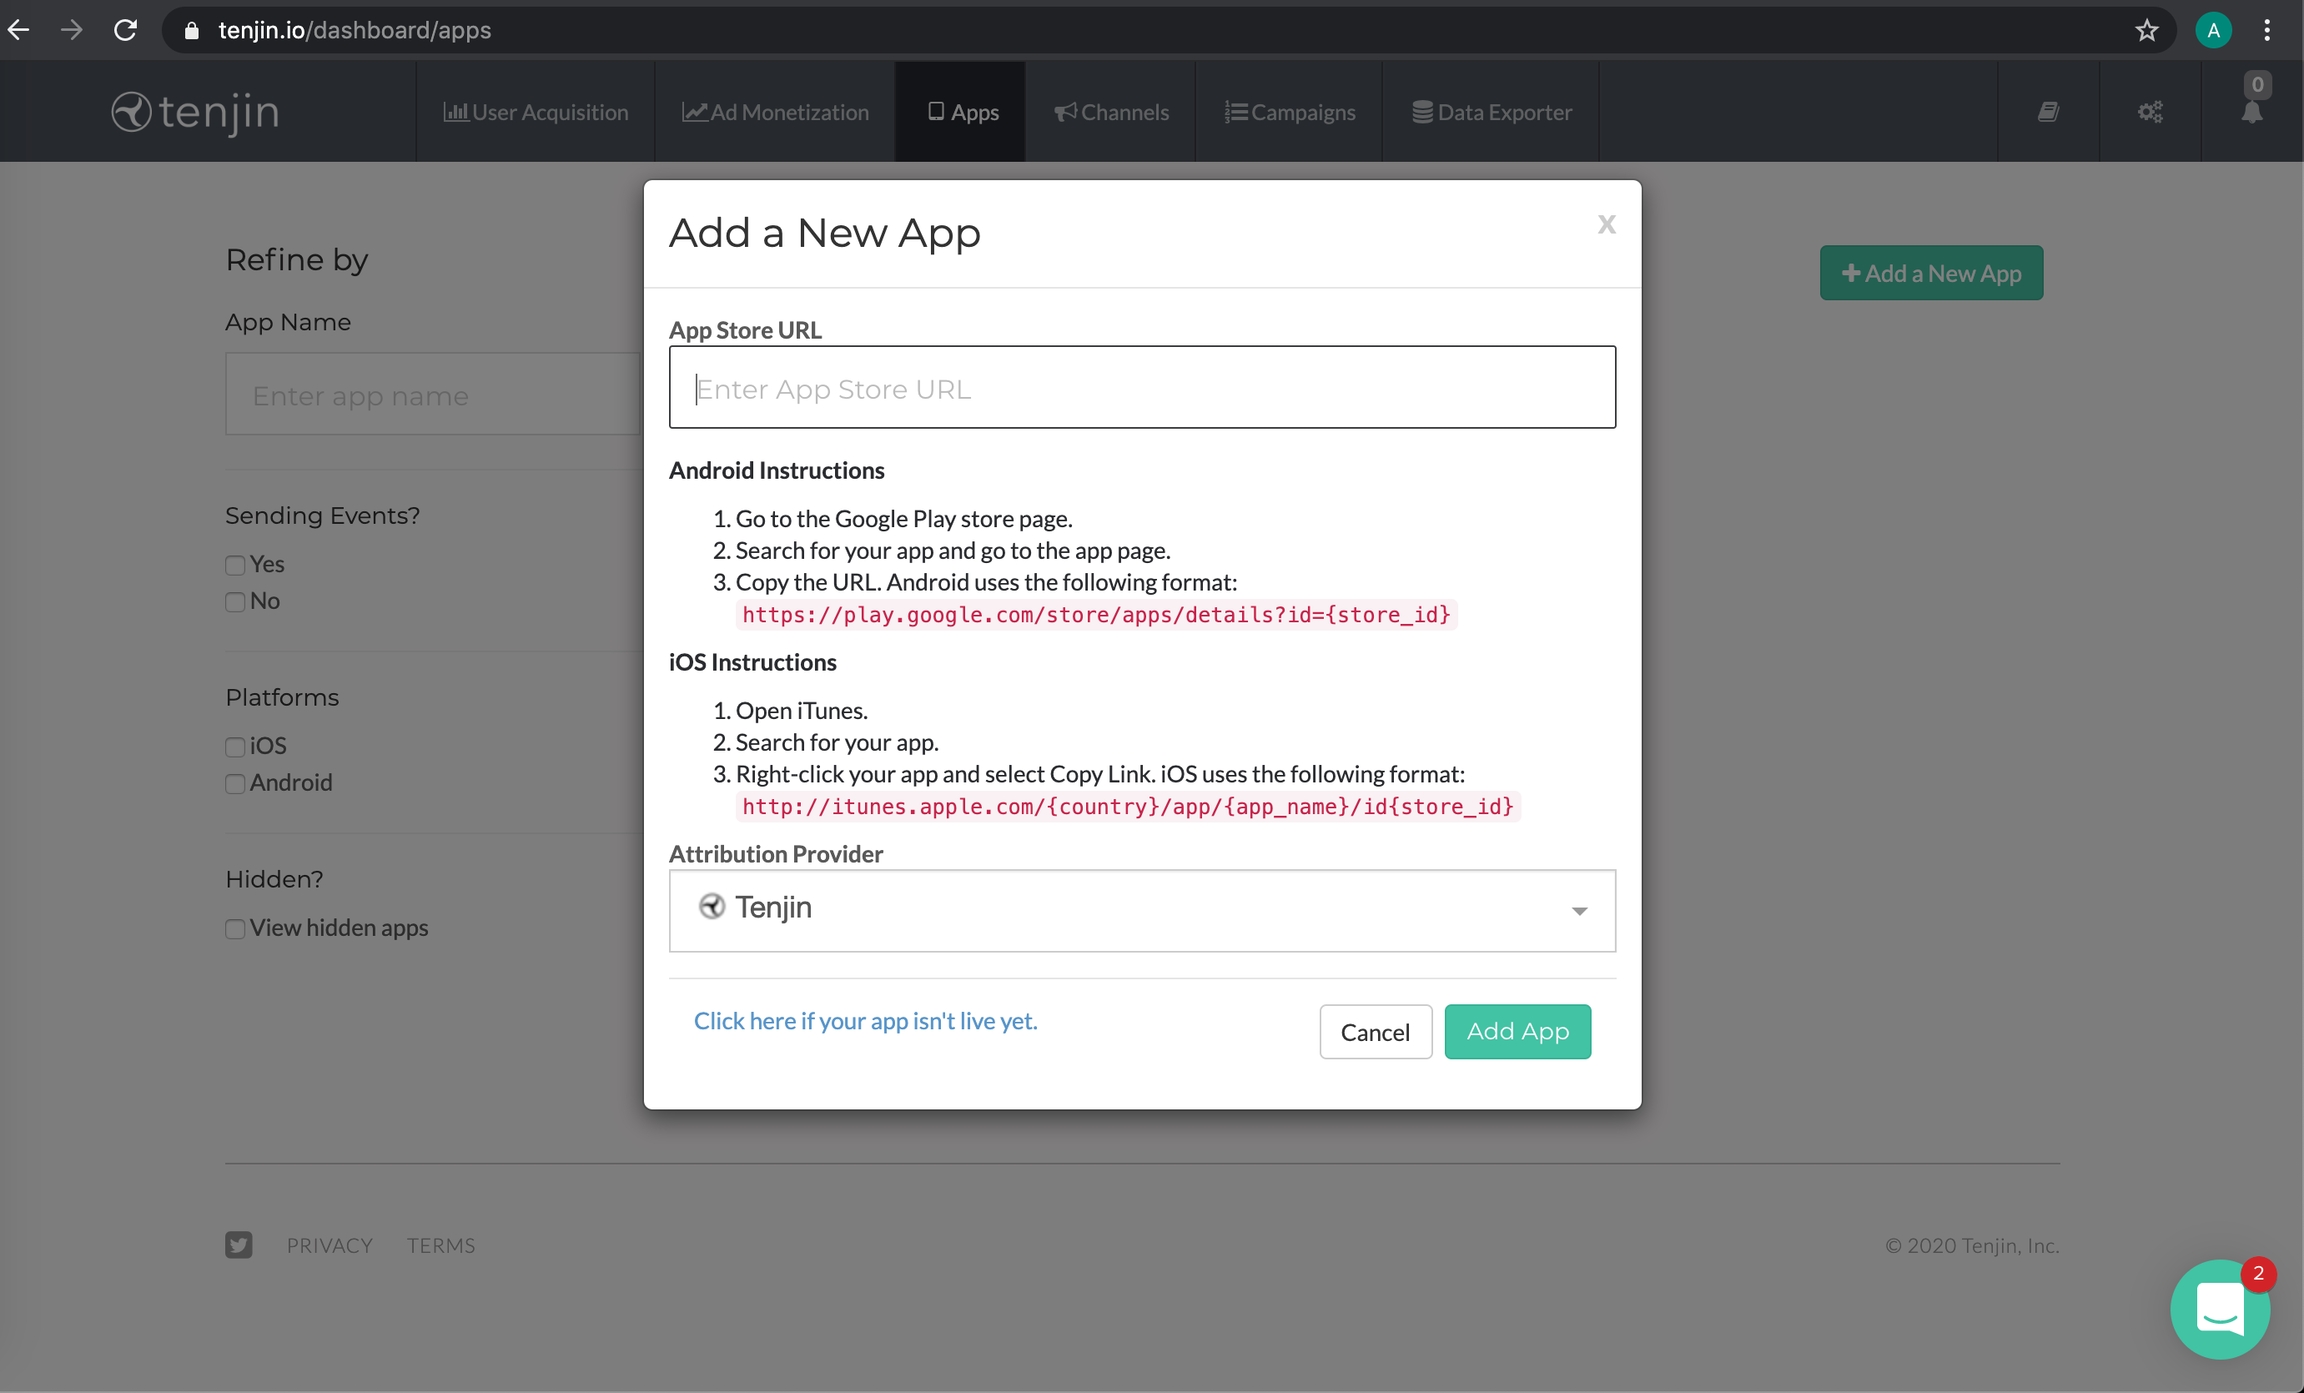
3. Add your app or edit an already existing app.
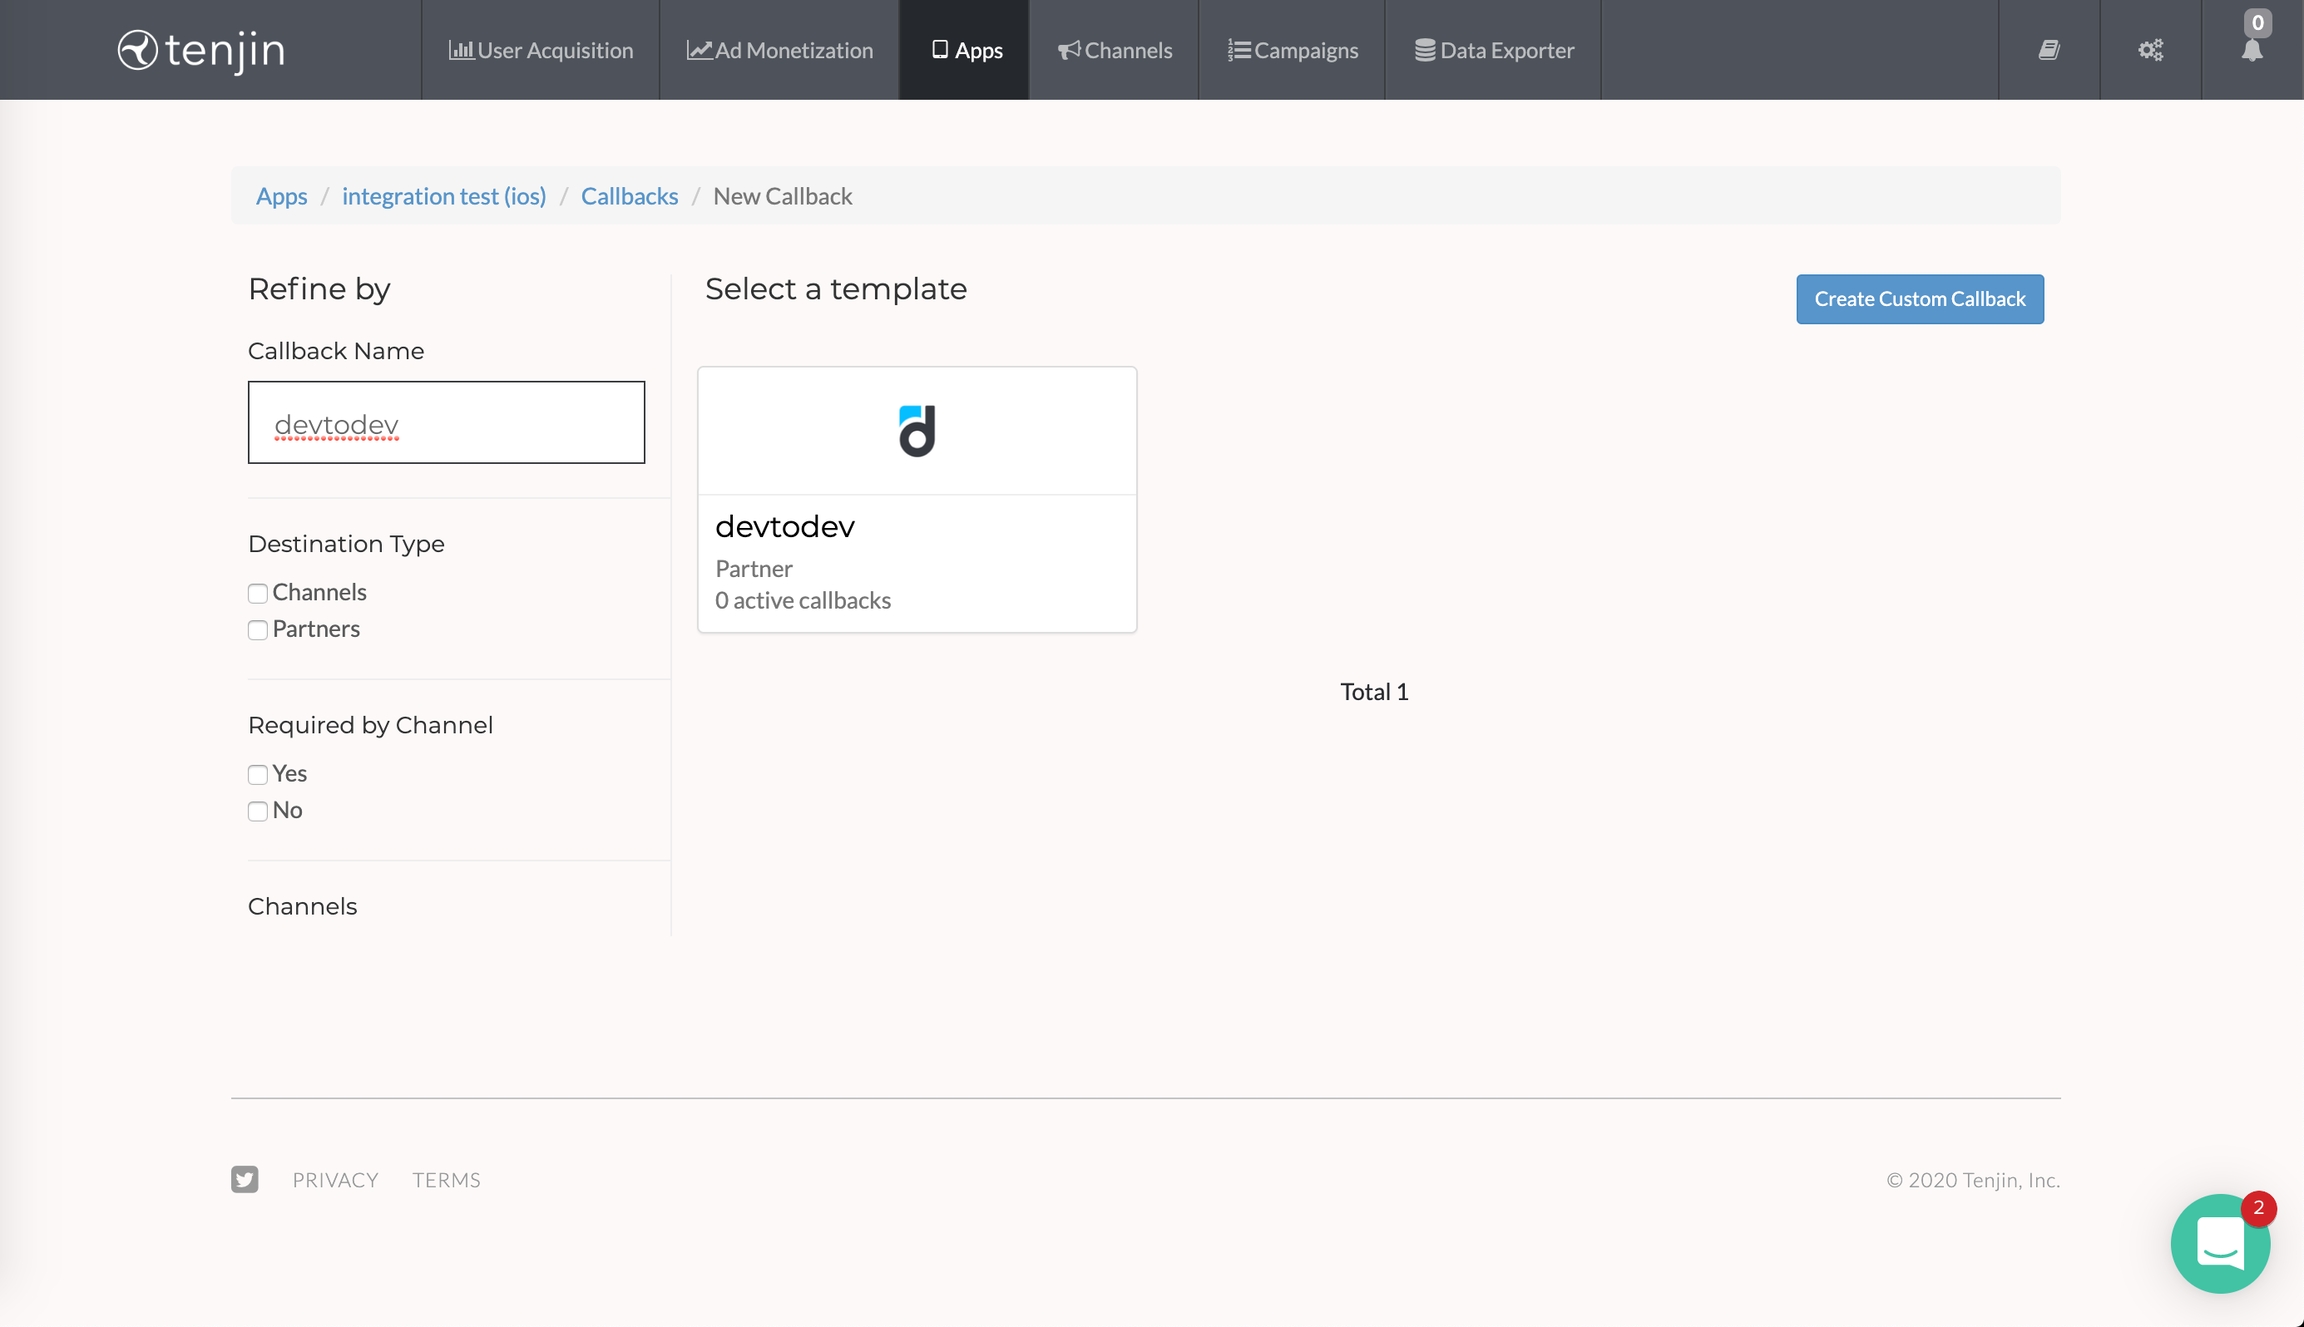
4. Add a new callback.
5. Select devtodev.
6. Open the application that you are configuring in devtodev. Open 'Settings -> 3rd party sources -> Attribution trackers', turn on the toggle switch on Tenjin panel and copy devtodev API Key from the panel.
7. Enter API Key in new callback form.
8. Save callback.
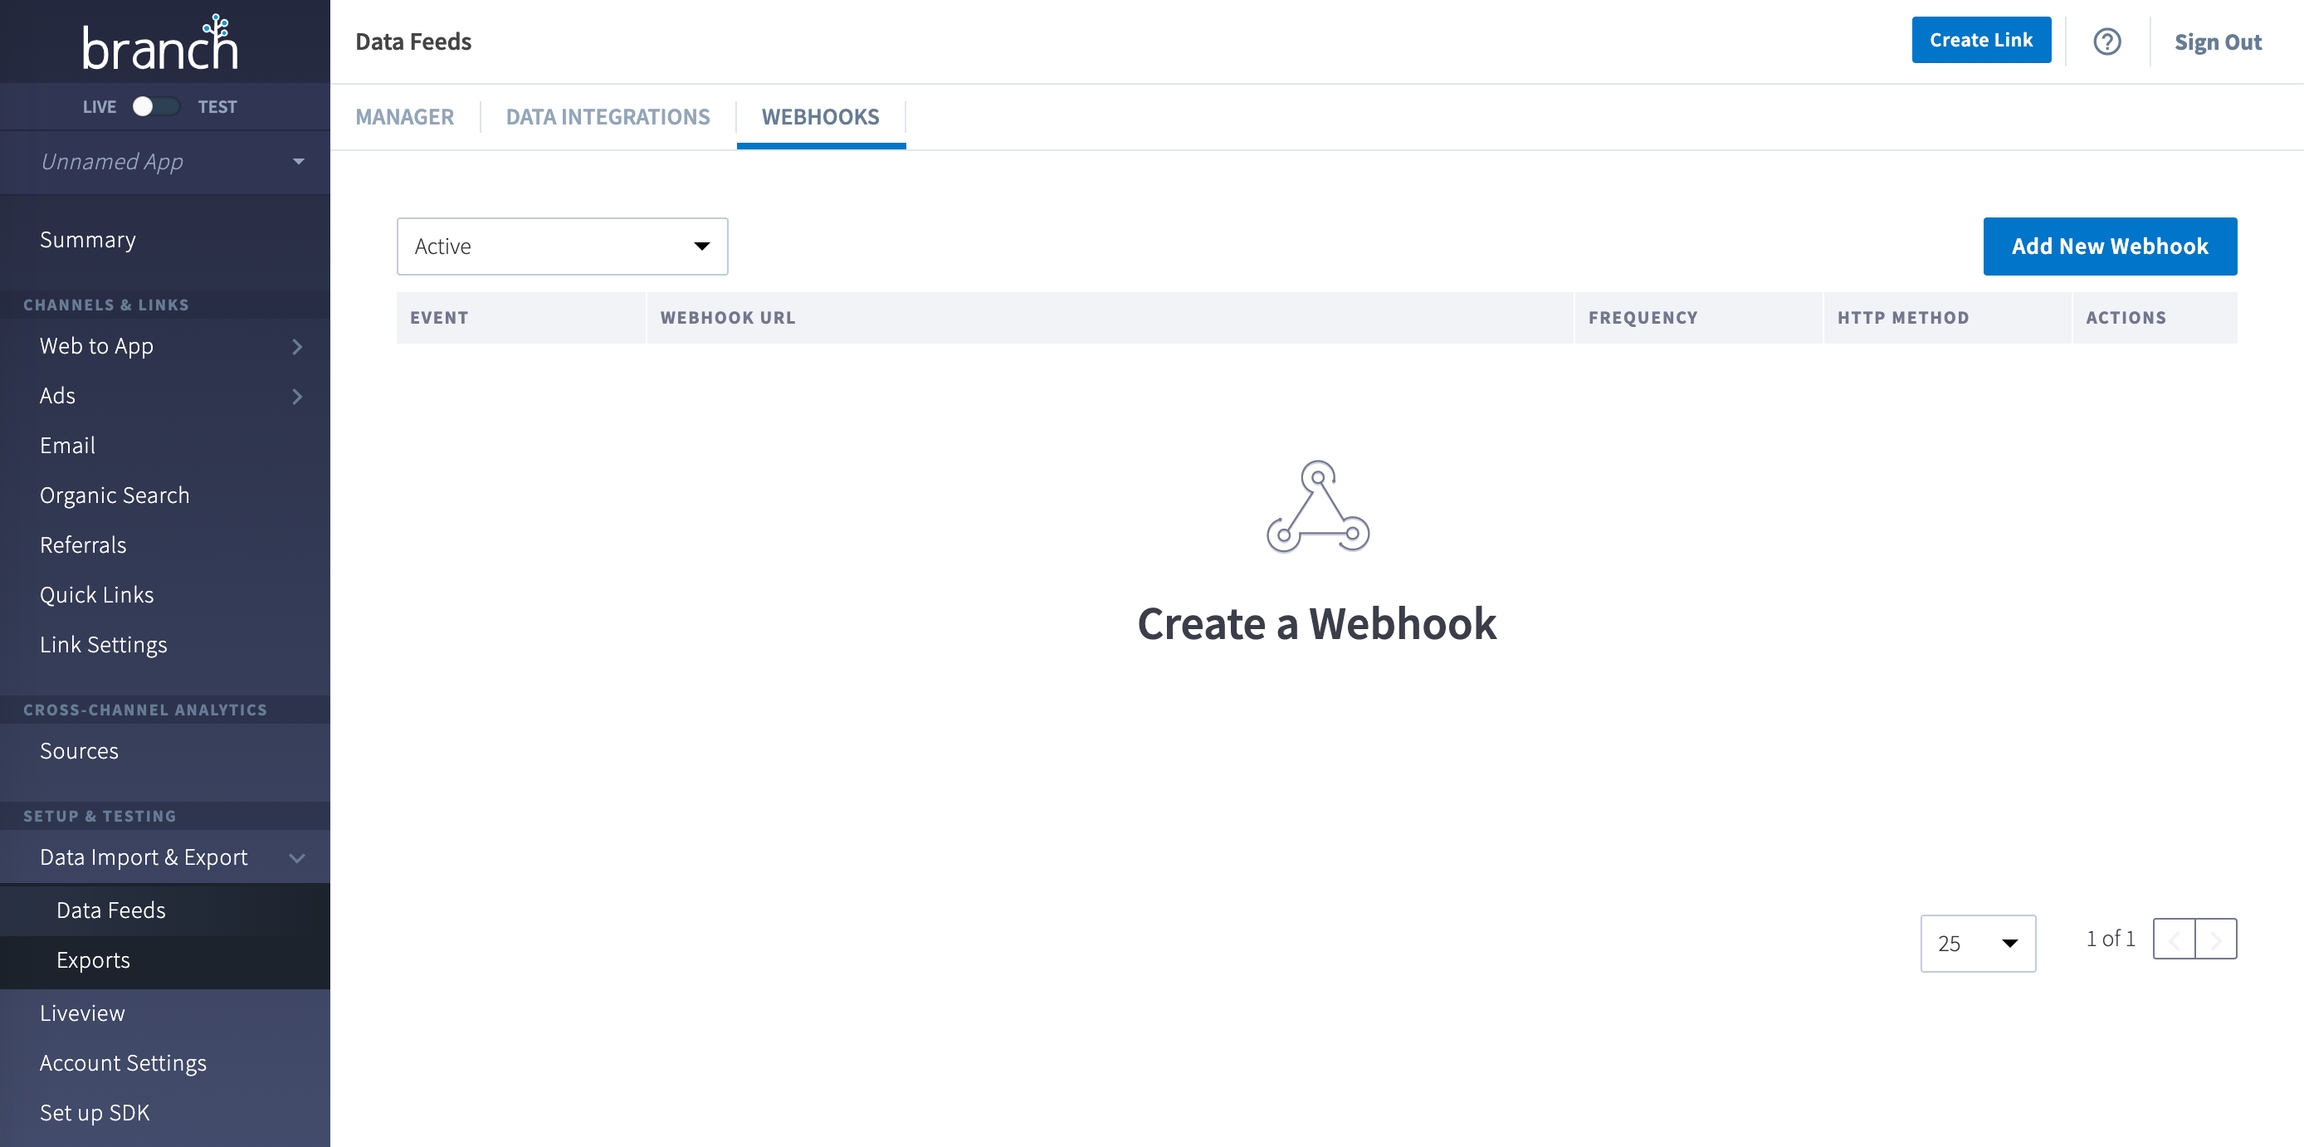
1. Sign in into Branch.io
2. Go to Data import & Export in the left menu
3. Go to Data Feeds in the left menu
4. Go to Webhooks in top tabs
5. Click Add new webhook button
6. Go to devtodev Settings -> 3rd party sources -> Attribution trackers and copy postback URL, then enable integration by clicking On button.
7. Paste the callback to webhook Send field and click Save.
8. Integration is complete.
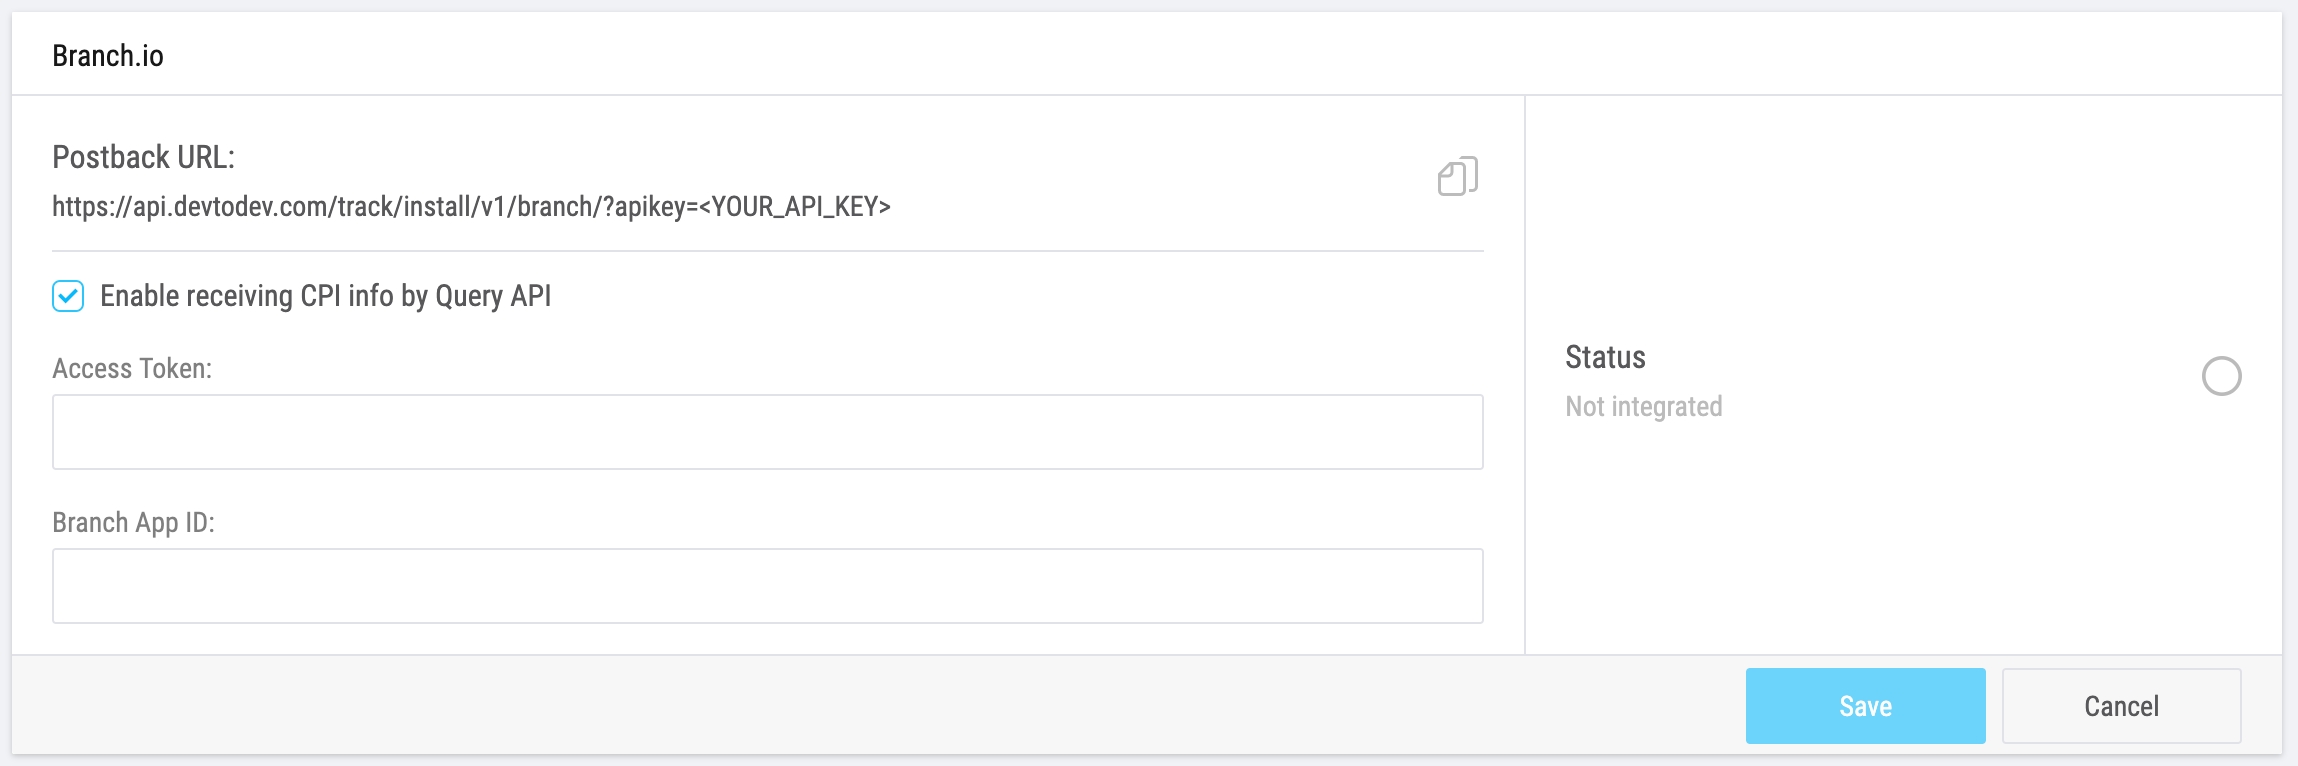
devtodev allows our customers to query CPI data from Branch.io via API in order to get more accurate install costs. Integration can be switched on by checking corresponding field in tracker settings interface and filling form fields:
Documentation on these fields and how to find them can be found here.
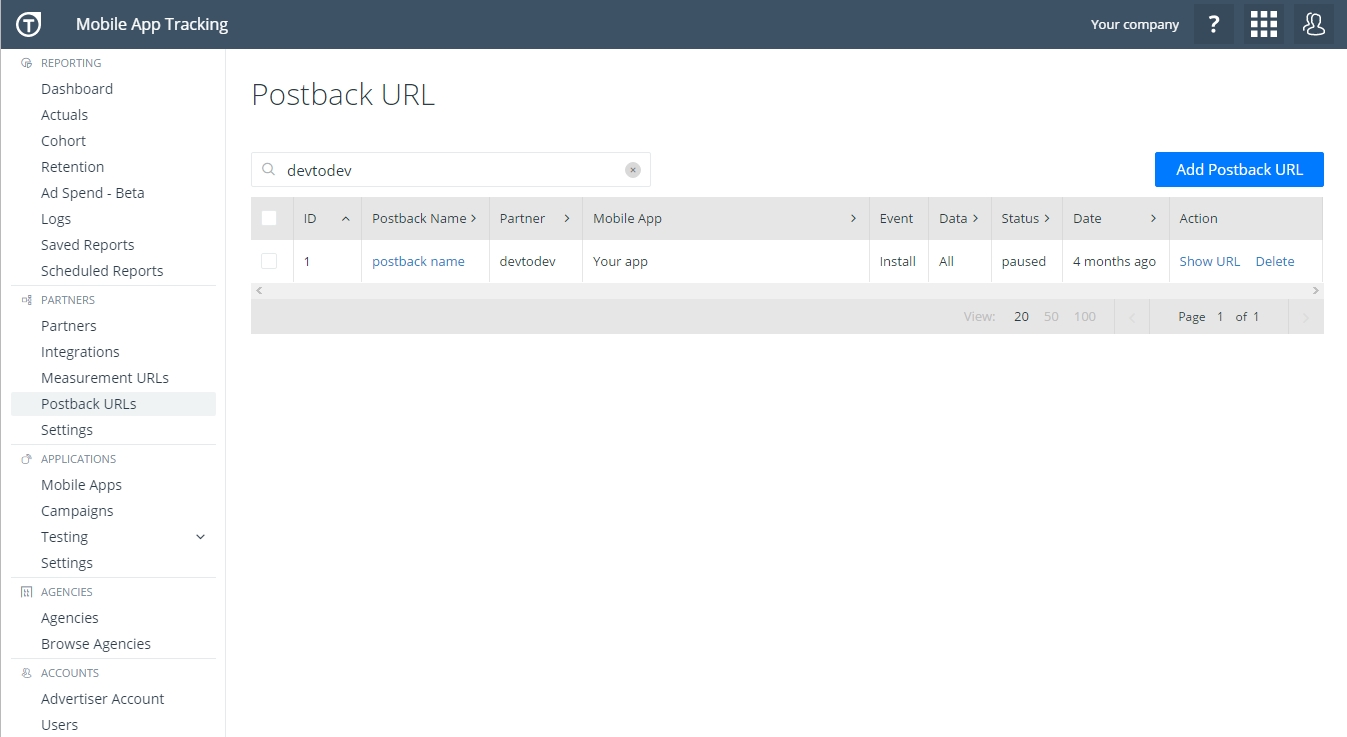
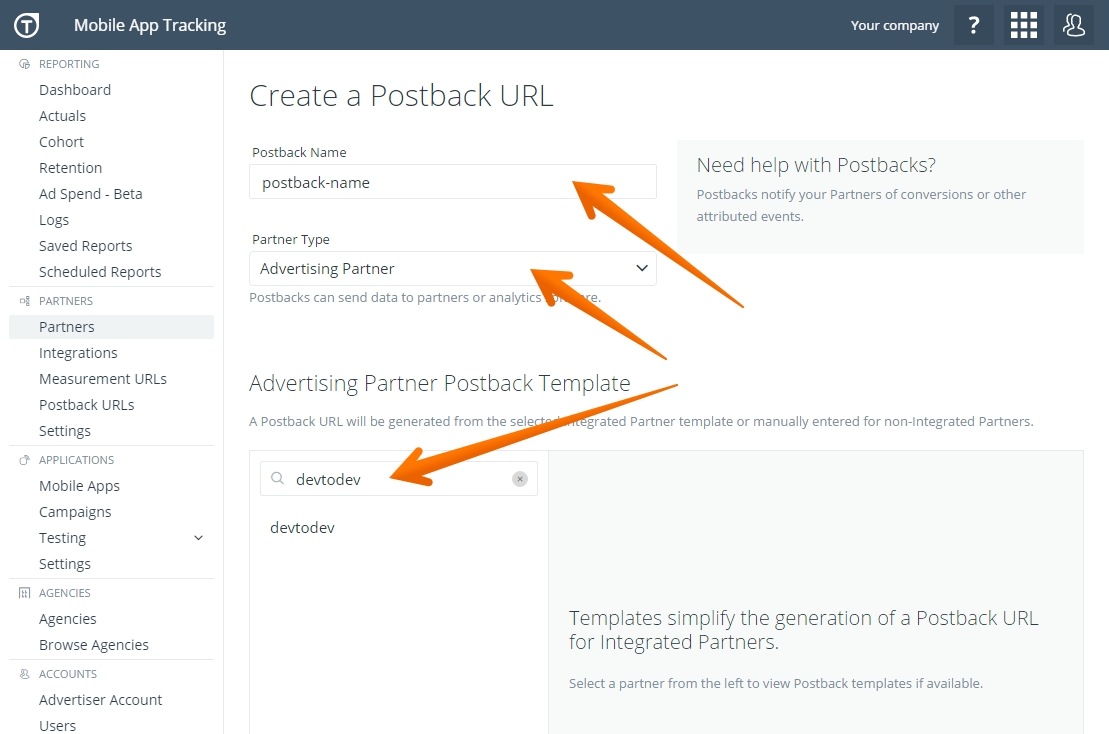
1. Sign in with Tune. 2. Go to "Postback URLs". Click "Add Postback URL".
3. Fill-in "Postback Name" field. Choose “Advertising Partner” in the field “Partner Type”. Find devtodev in Advertising Partner Postback Template list.
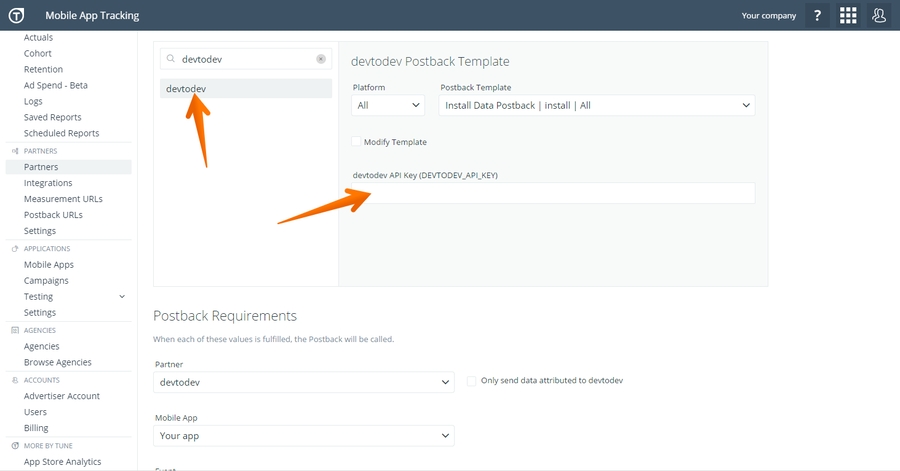
4. Copy the devtodev API key from “Tune” panel on "Settings -> 3rd party sources -> Attribution trackers" page in app settings in devtodev system. Don't forget to turn on the service.
6. Select "devtodev" from "Partner" list. Chose the app you want to track from the list. Be careful when choosing from several apps. Set “Install” in the field “Event”. Open Advanced Settings.
7. Set “POST” in the field “HTTP Method”. Set "Post Data Type" to “json”. Postback status - “Active”. Connection status - "Approved". The remaining fields are optional.
8. Click "Save".
9. Integration completed.
If you have multiple mobile apps for which you would like to set up this integration, you will need to follow steps 4-10 for each one of your mobile apps individually.
1. Official Adjust documentation for enabling devtodev partner module can be found here.
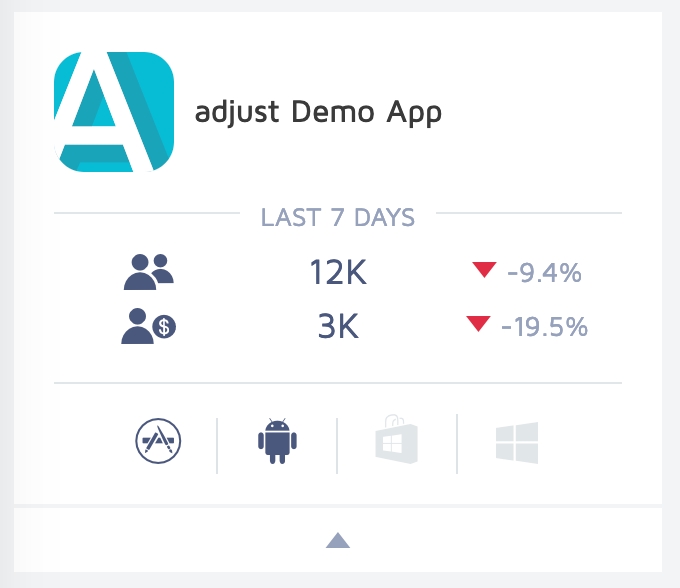
2. Go to Adjust Dashboard
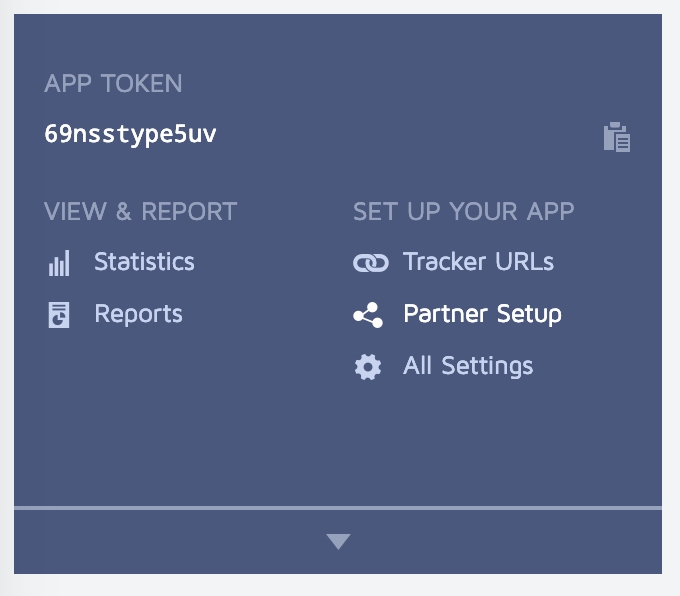
3. Open Partner Setup:
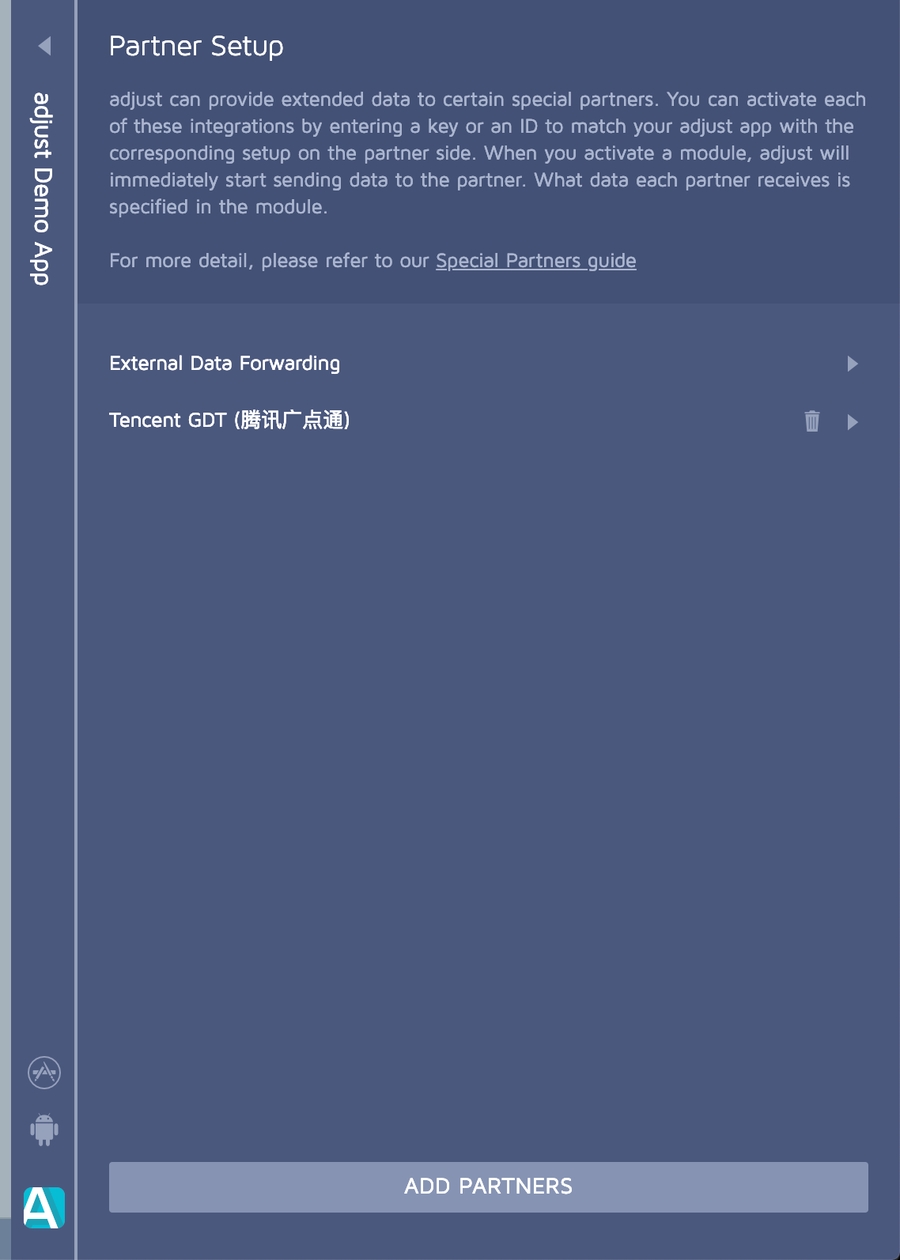
4. Click Add Partners:
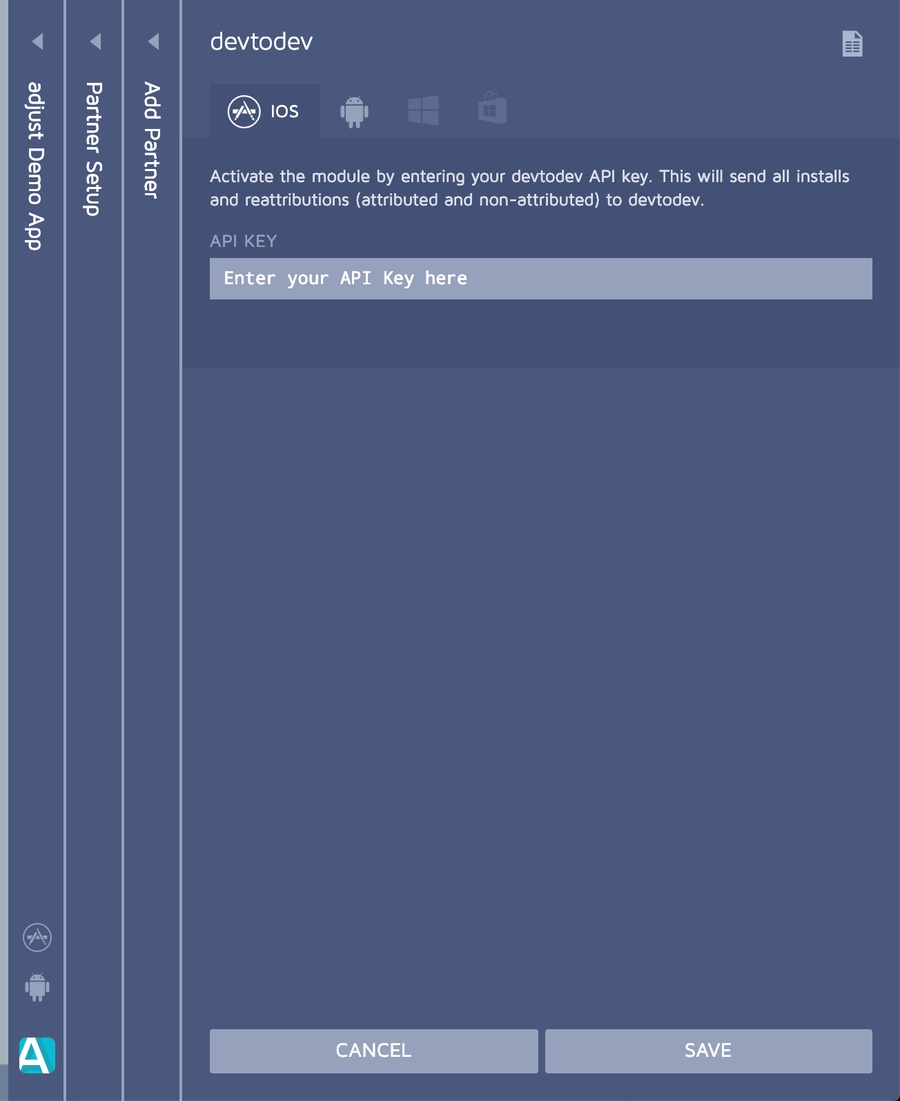
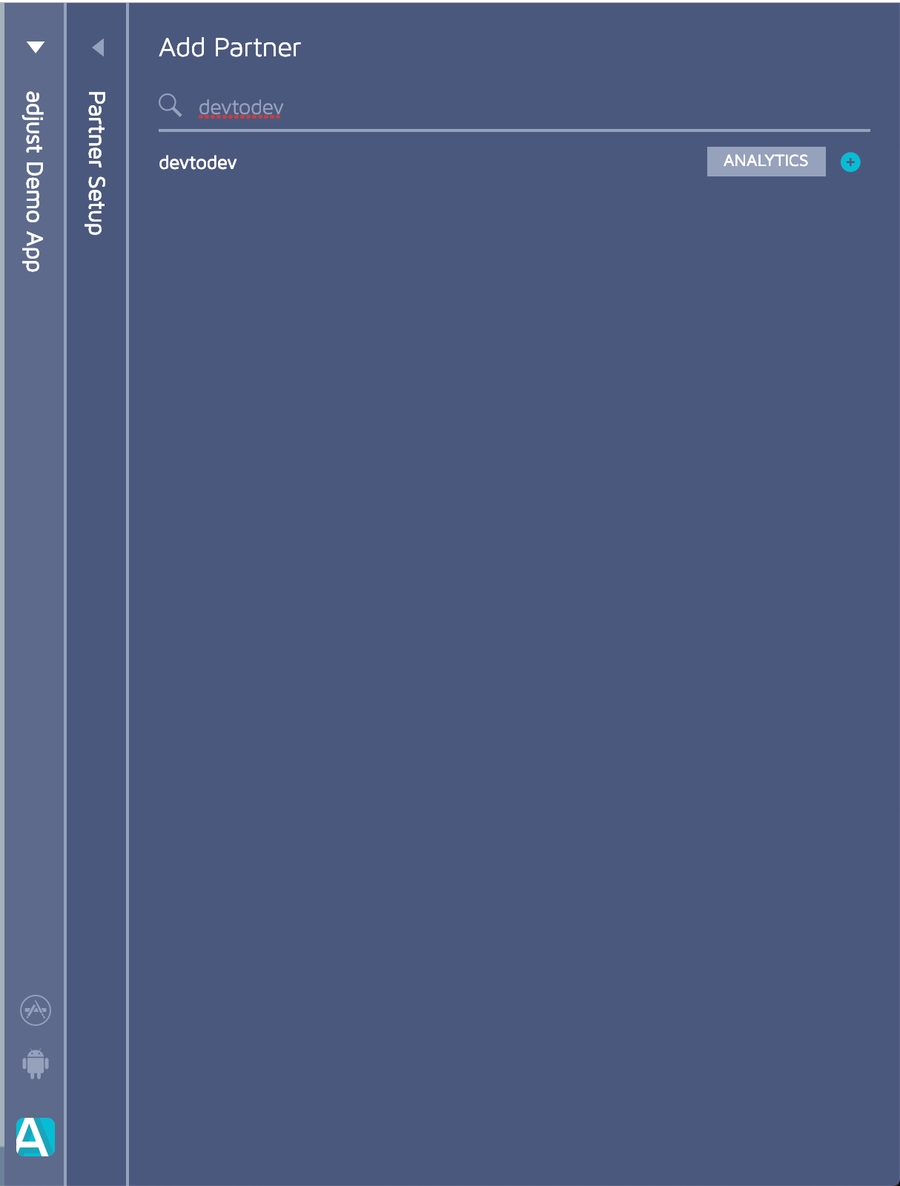
5. Search devtodev and click blue plus button:
6. Go to devtodev 'Settings -> 3rd party sources -> Attribution trackers' page of preferred app and copy your API Key:
8. Click On in the Settings > 3rd party attribution page in Adjust panel.
9. Integration is now complete
devtodev allows our customers to query CPI data from Adjust via API in order to get more accurate install costs. Integration can be switched on by checking corresponding field in tracker settings interface and filling form fields:
Documentation on these fields and how to find them can be found here.
This functionality is available only for projects with integrated devtodev SDK version 2.1.0 or higher for native applications and not lower than 3.1.0 for Unity!
Please note that the current section describes how to integrate only one source of subscription data - from the Google Play. You’ll also need to integrate the Subscription event via SDK to get the subscription data in the devtodev reports (the documentation link is at the bottom of the page). When you integrate both data sources (Google Play and SDK), you’ll be able to see the Subscription report and devtodev will connect that data with the users successfully. If one of the integrations is missing, the Subscription report won’t be working correctly.
To create a service account, click the link https://console.cloud.google.com/apis/credentials/serviceaccountkey
If you already have selected an active project, then skip the project selection block below.
Select the project that you will link to the service account and for which you will collect subscription data later. If the project is not listed, create it.
In the list of available service keys, click on the Create service account link.
In the provided free form, fill in the required fields (use the screenshot below as an example). And click the continue button. Skip the rest of the form by clicking next and confirm the creation of an account at the end of the form.
After creating a service account, you will be returned to the list of available accounts. Select the created account and open the KEYS tab, click the ADD KEY button, and then select the JSON option in the pop-up window. Confirm your choice by clicking the Create button. The generated key file will be automatically downloaded. This key you will need to download to the subscription analysis connection form.
Go to the IAM section in the Permissions tab and click ADD+ to add roles to the service account. In the appeared form, enter the service account address and give it the Pub/Sub Subscriber role. If you don’t have this role, you need to activate the Pub/Sub service in the Cloud Platform. Save the changes.
Next, you need to give the service account permission to receive data on subscriptions and refunds. To do this, go to the Setup tab → API Access in the Google Play Console.
If you’ve completed all steps correctly, you will see the created service account in the list. Click on View access to set permissions for the account.
If you need to set permissions for all the account apps at once, select the Account permissions tab and set permissions as on the screenshot below.
If you want to select some apps, go to the App permissions tab, click on Add app, select the apps you need in the list and set the following permissions:
In the Google Cloud Platform, go to the list of topics in the Pub/Sub service https://console.cloud.google.com/cloudpubsub/topic/list
Select the project on which you want to collect subscription data if it is not selected yet, then click the CREATE TOPIC link and create a topic. To do this, fill in the Topic ID (use the screenshot below as an example), disable Add a default subscription option and confirm the topic creation.
Add the service account google-play-developer-notifications@system.gserviceaccount.com, and grant it the role of Pub/Sub Publisher.
After that, open the list of subscriptions and create a subscription.
In the appeared form, specify the Subscription ID (always with devtodev-subscription), in the field below specify the topic you’ve just created, in the Delivery type choose Push and in the Endpoint URL field insert the link obtained from the devtodev subscription integration window. All other parameters remain unchanged.
To get Endpoint URL go to devtodev, select the same app and open the app settings (Settings -> 3rd Party Sources -> Google Play Console). Copy the Endpoint URL
After creating a subscription in the Pub/Sub service, you need to open the developer console and register the created topic as a target for RTDN (Real-time developer notifications). To do this, go to the app’s Monetization Setup section and enter the full name of the topic in the Topic name field. After that, send a test notification using the link below. If everything is configured correctly, then the test notification will change the integration status of the subscription in devtodev to Active.
Remember to save your changes.
Go back to the devtodev app settings, specify the app package, and upload the private key file you received in Step 1.
Add all existing subscriptions, specifying the bundle, subscription period, and name for each subscription.
Save changes
Don't forget to integrate the subscription-specific SDK methods.
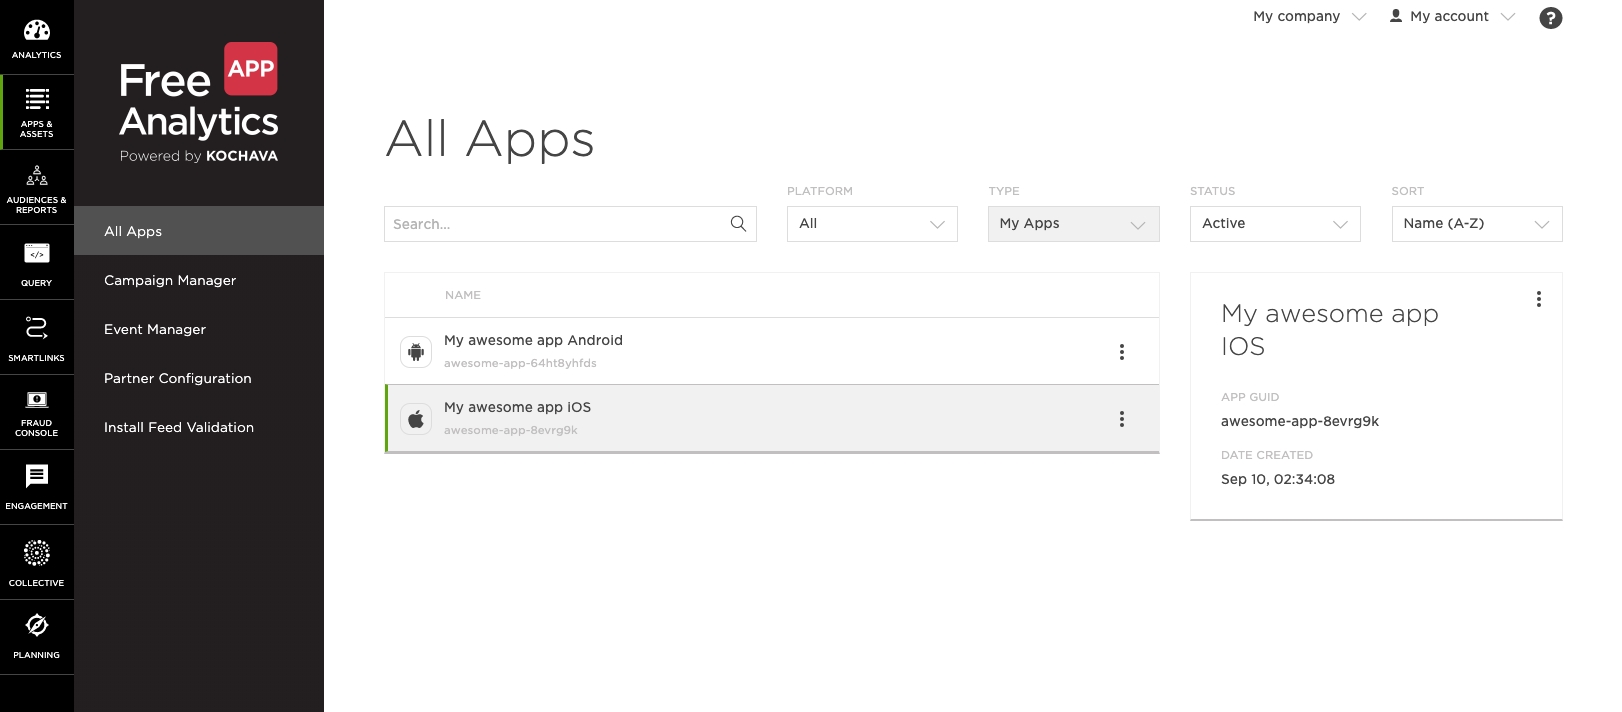
1. Login to your Kochava account and select the application you want to configure
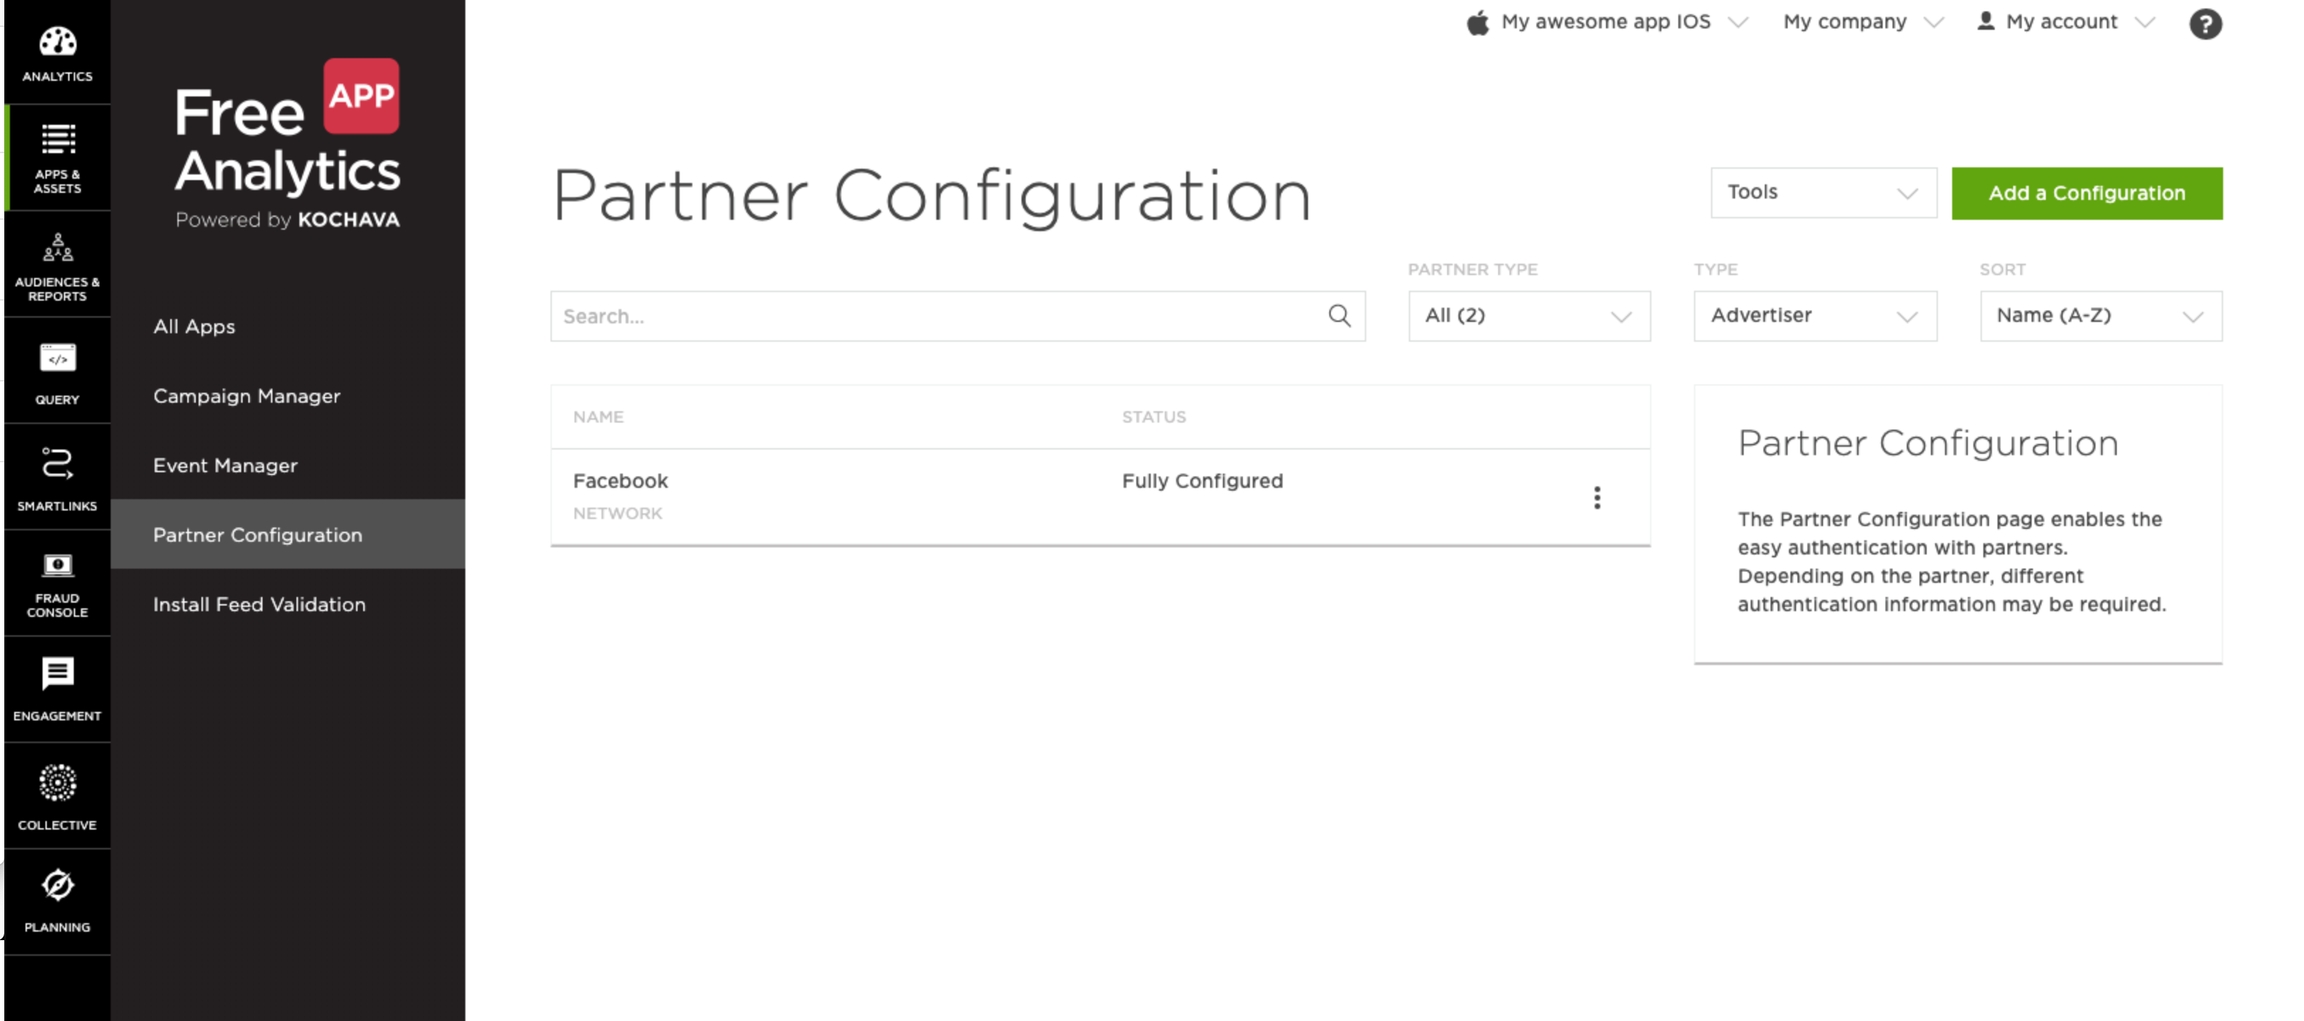
2. Go to the partner configuration page and click the Add a Configuration button
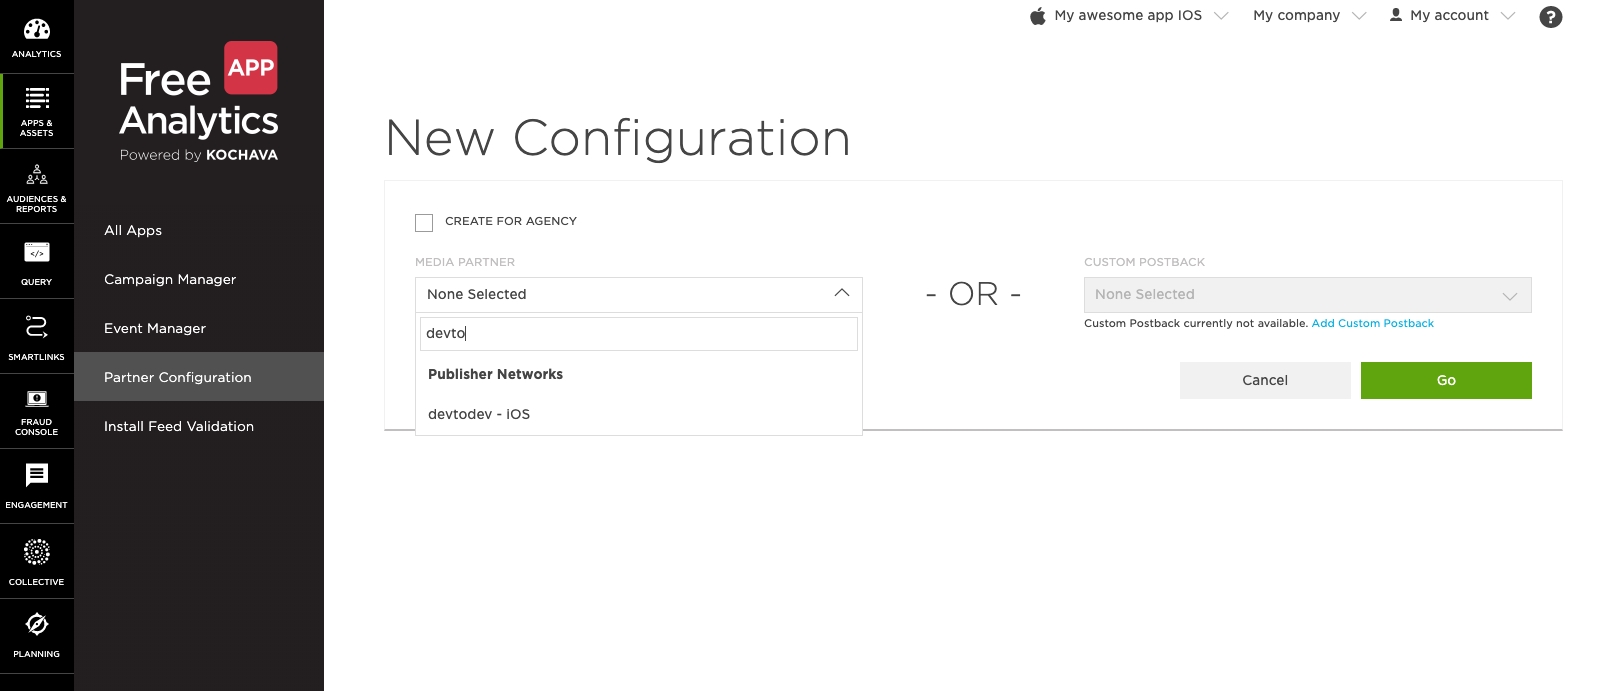
3. Find devtodev in Media Partners list, select it and click the Go button
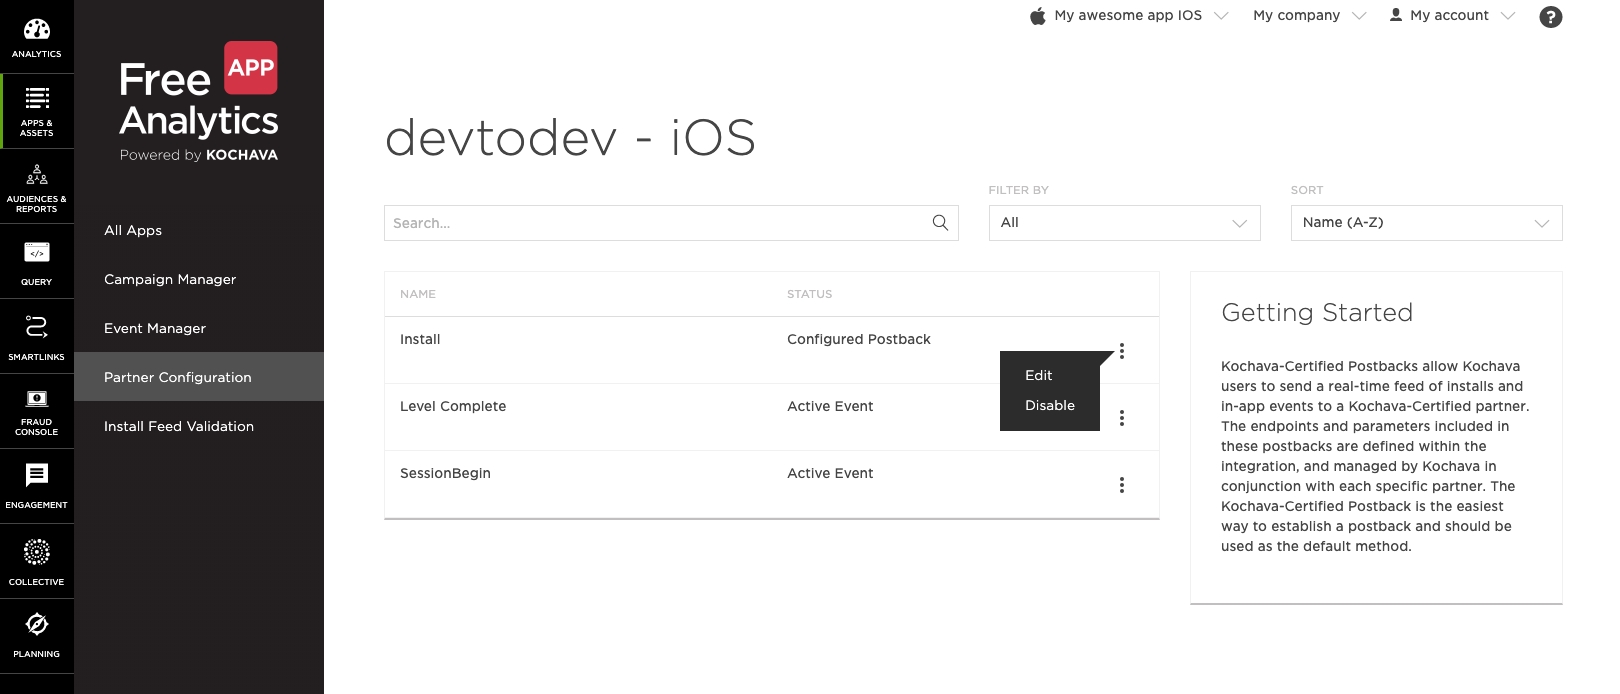
4. Click the Edit button on the Install event.
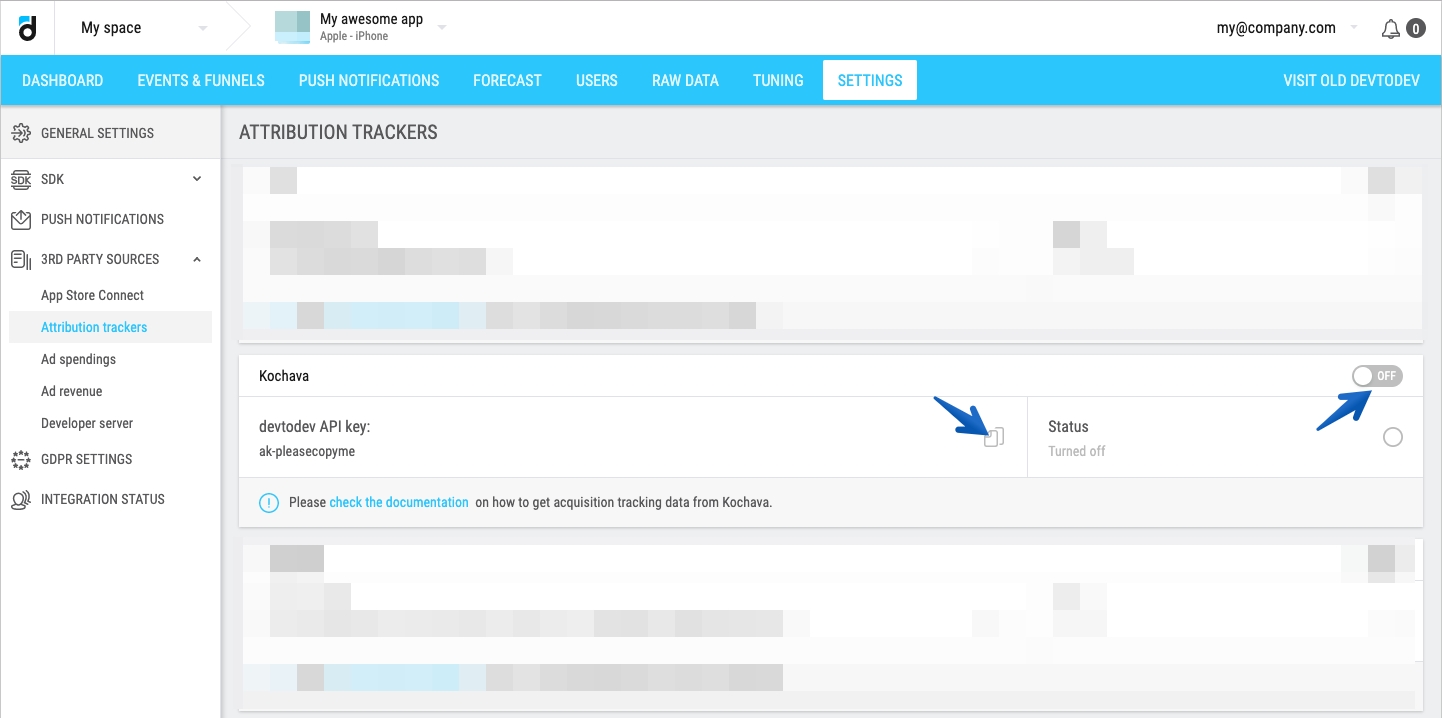
5. Open the application that you are configuring in devtodev. Open 'Settings -> 3rd party sources -> Attribution trackers', turn on the toggle switch on Kochava panel and copy devtodev API Key from the panel.
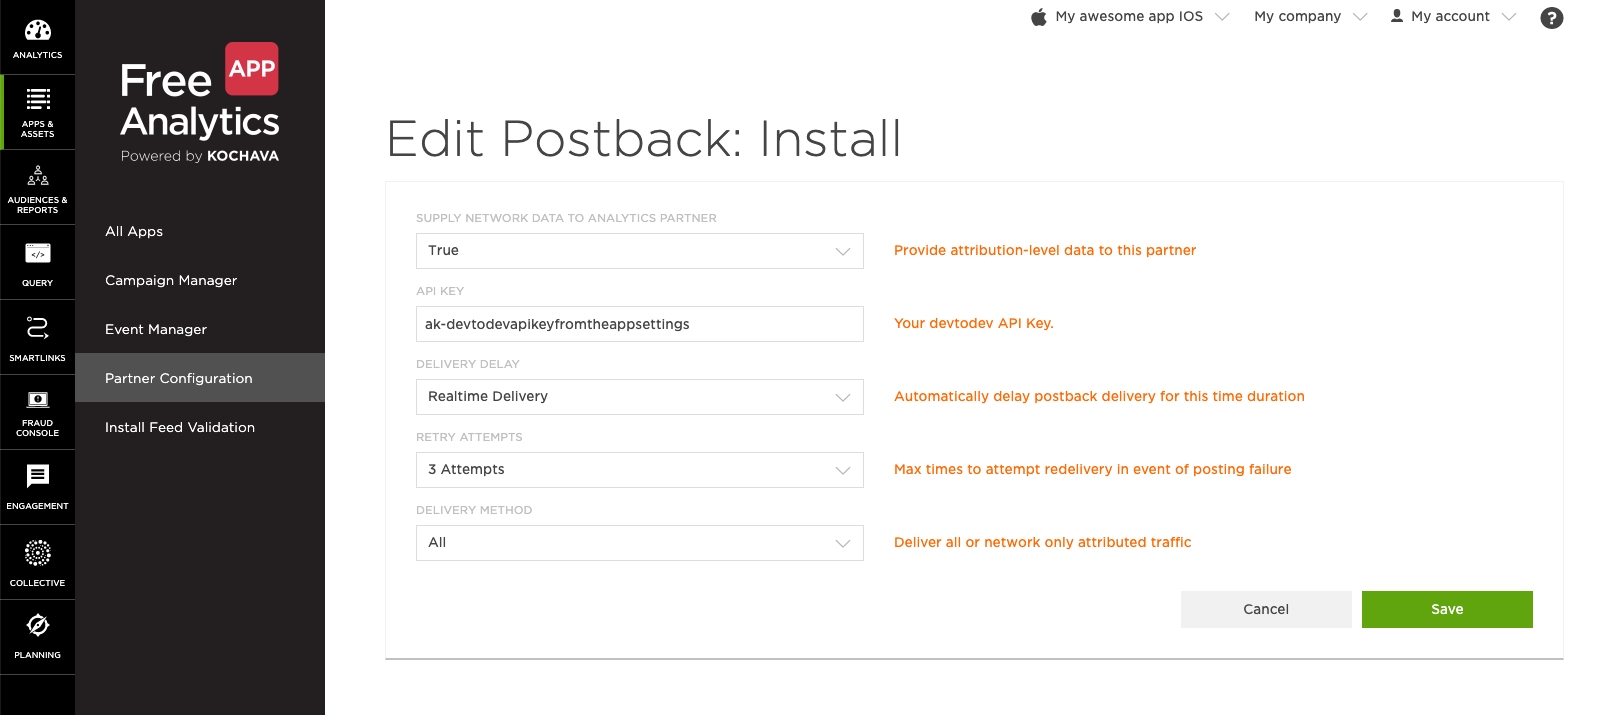
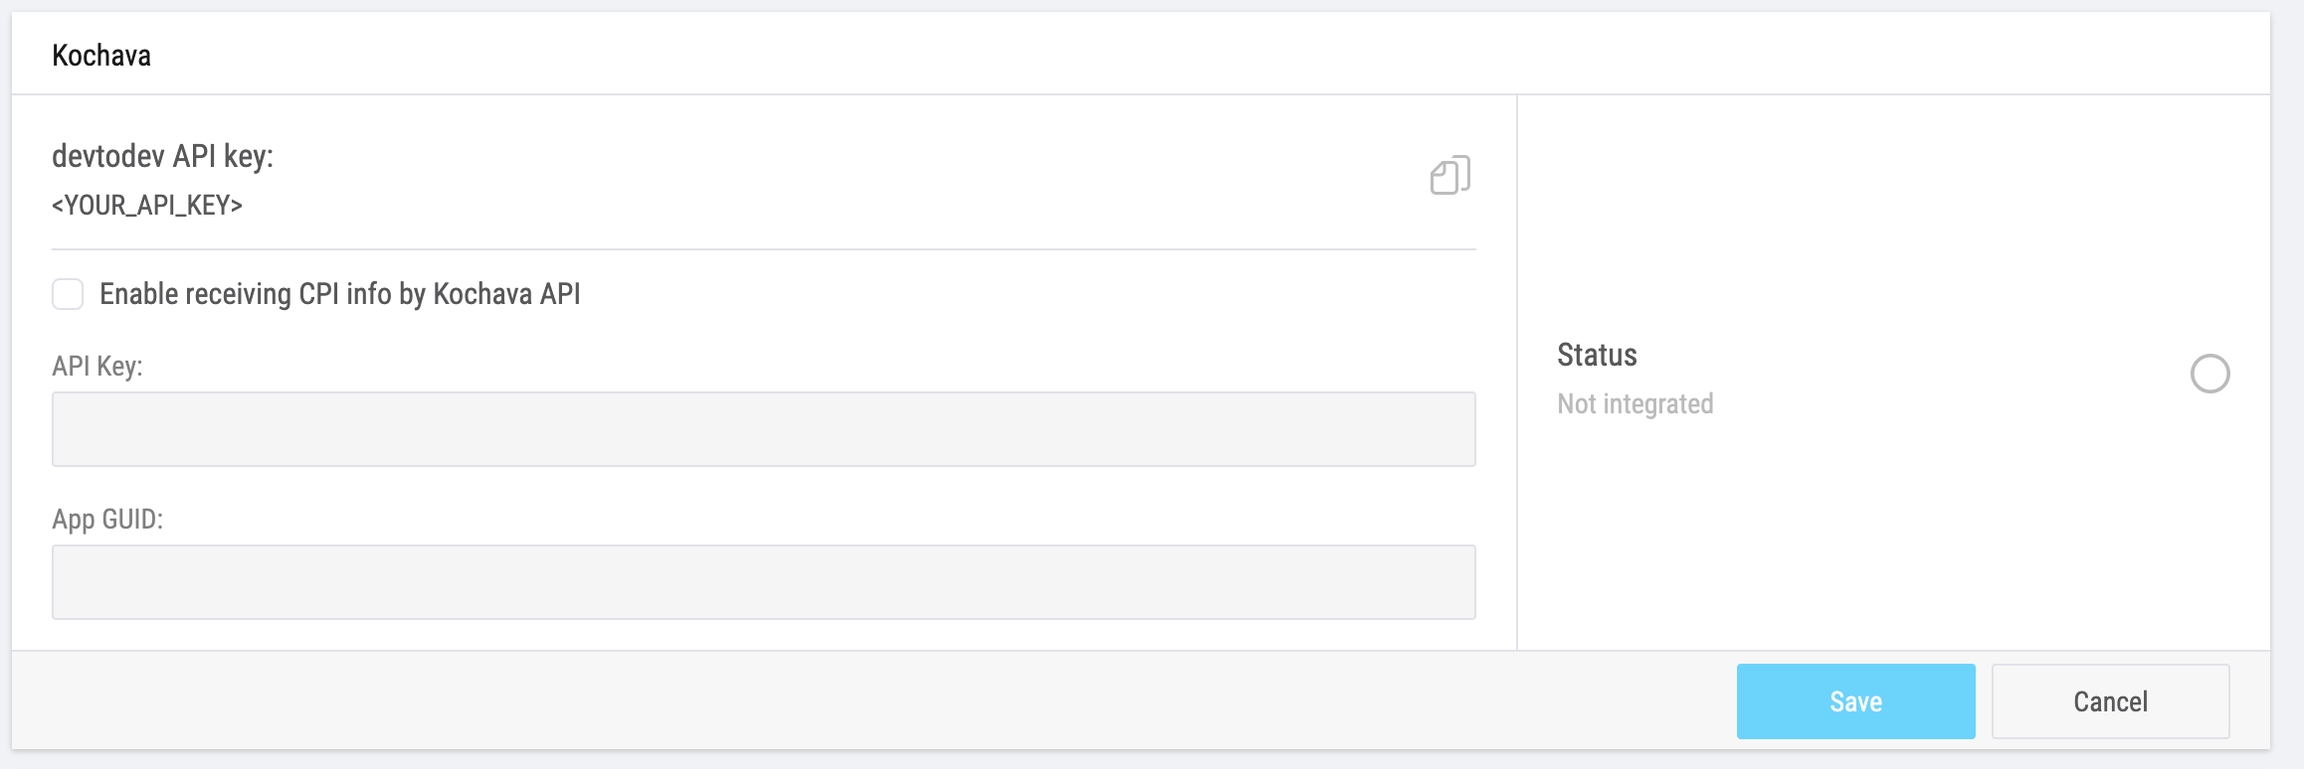
6. Insert copied API key into Kochava postback settings. Copy all other fields from the following image and click the Save button. Important: Select Delivery method -> All
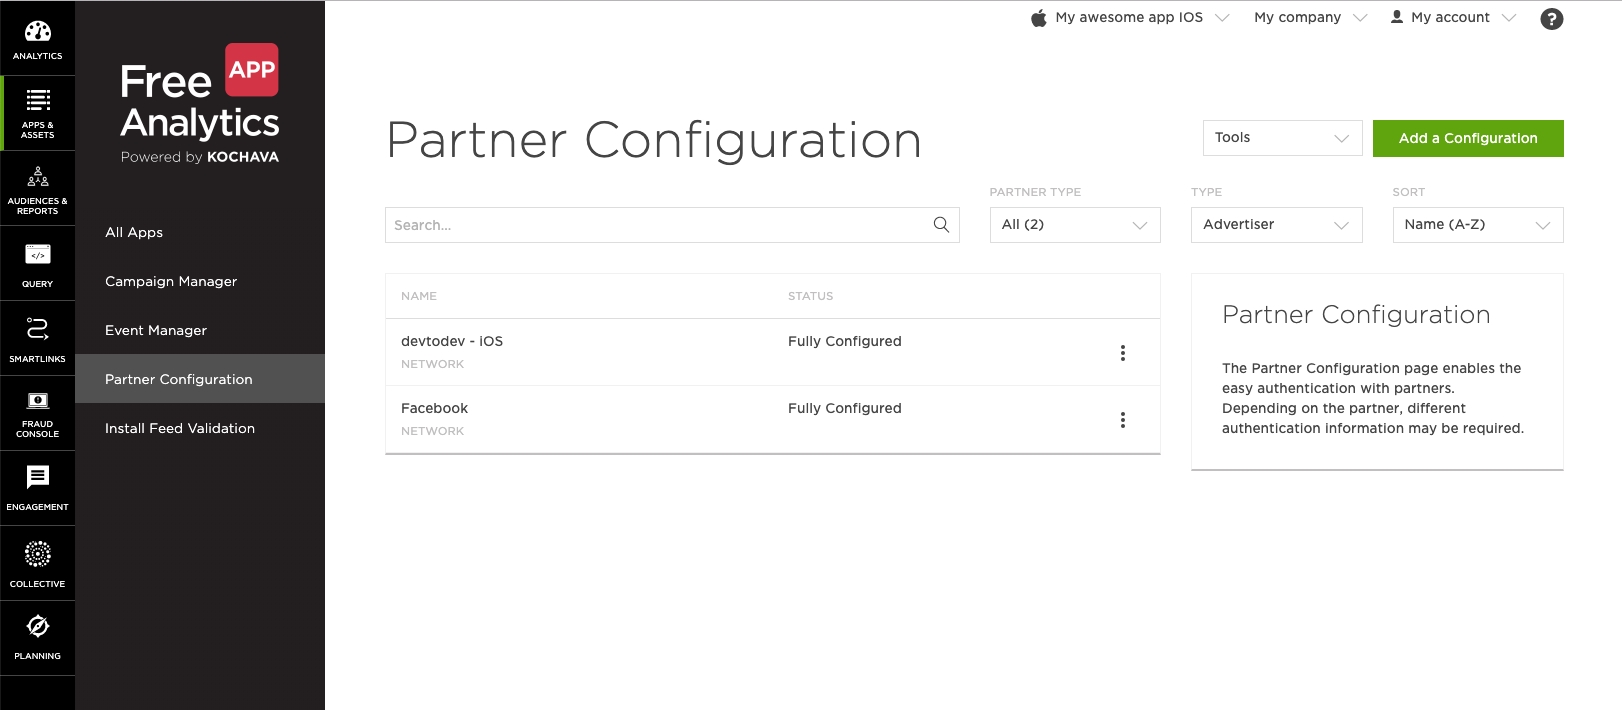
8. Make sure that postback has appeared on the Partner Configuration page.
devtodev allows our customers to query CPI data from Kochava via API in order to get more accurate install costs. Integration can be switched on by checking corresponding field in tracker settings interface and filling form fields:
Documentation on these fields and how to find them can be found here.
devtodev enables you to use Google Play platform to obtain data on installs driven by Facebook Ads campaigns. There are 2 ways to get this information:
From Google Play Store via devtodev SDK. The SDK versions 2.1.3 (SDK for Android native) and 3.1.0 (SDK for Unity) and above automatically sends data on installs driven by Facebook ads (when using Play Install Referrer Library)
From Appsflyer via postback (Appsflyer Push API)
The data we receive is encrypted therefore you need to decrypt them by using an Install Referrer Decryption Key which is unique for each app. See Facebook documentation to learn more.
We use the key to decrypt the information received from Facebook and convert it back to the original form so that we can use it in our reports.
Obtain the Install Referrer Decryption Key from your Meta for Developers account (Select your app->Settings->Basic->Android). Copy it.
Go to your project settings at devtodev (Settings -> 3rd party sources -> Attribution trackers->Facebook Ads referral decryption) and insert the key.
If you don’t enter the Decryption Key in the app settings, then all the decrypted data sent by devtodev SDK will be discarded and can not be restored.
Custom user id. You can apply it if it's set as a param during SDK init or in SDK method or field in case you are using data API.
5. Paste the devtodev API key into the field.
7. Enter your API Key in the field for corresponding platform and click Save:
devtodev provides a connection to different ad networks to collect ad revenue data on a daily basis.
Applovin
Fyber
HyprMX
myTarget
Yandex
There are also ad mediation platforms that provide us user-level data. This is the ad revenue information that is included in all devtodev’s monetization and game reports: Basic Metrics, Acquisition (Dashboard, Monitoring, Detailed stats, LTV prediction), Monetization section, Cohort analysis, In-game analysis (Player levels, Cumulative metrics by levels).
ironSource
Applovin MAX
devtodev also provides an API for Ad Revenue to allow our customers to send information about revenue earned by ads displayed in their apps.
This functionality is available only for projects with integrated devtodev SDK version 2.1.0 or higher for native applications and not lower than 3.1.0 for Unity!
Please note that the current section describes how to integrate only one source of subscription data - from the App Store. You’ll also need to integrate the Subscription event via SDK to get the subscription data in the devtodev reports (the documentation link is at the bottom of the page). When you integrate both data sources (App Store and SDK), you’ll be able to see the Subscription report and devtodev will connect that data with the users successfully. If one of the integrations is missing, the Subscription report won’t be working correctly.
Go to App Store Connect
In My Applications, select the app for which you would like to start analyzing subscription data.
In the General information block in the left menu column, navigate to the Application information section.
Go to devtodev, select the same app and open the app settings (Settings -> 3rd Party Sources -> App Store Connect).
Copy the Endpoint URL
Go back to App Store Connect, find the General App Information section below and insert the URL you have obtained before.
Click Save to confirm your changes.
Click Save.
Go back to the devtodev application settings, specify your application bundle and add all existing subscriptions, specifying the bundle, subscription period, and name for each subscription.
Save changes
Don't forget to integrate the subscription-specific SDK methods.
Go to reports section and click Enable data access through API checkbox:
Click on View API access details:
Copy API key and Inventory report ID into corresponding fields in devtodev and enable integration:
Integration with App Store Connect. Adding App Store Connect account with limited access.
Before a company can use devtodev services, it must first agree to our Privacy Policy and Terms of Service. Even though we take your privacy seriously and use your App Store Connect account to collect only relevant sales data, you can ensure the security of your data by setting up a separate App Store Connect account, just for devtodev. Follow this step-by-step to set up an App Store Connect account and link it to your devtodev account.
Step 1 — Sign in
Sign into the App Store Connect page at https://appstoreconnect.apple.com/ and click Users and Access. The team agent can create the additional users or can create a user with an Admin role who can create additional users.
Step 2 — Users and Access
Click "+" button. If the button doesn’t appear, you don’t have access to create iTunes Connect users. The team agent, or an Admin user, needs to create the new user or update your roles to allow you to create new users.
Step 3 — Add New User
Fill in all required fields and click Next button. The address specified must be valid to activate the account as user receives an email as a confirmation.
Roles give access to App Store Connect modules. Check "Finance", “Sales” and "Reports" and press “Next”. You can learn more info on roles here.
Step 4 — Activate new account
The new user receives an email from the iTunes Store that includes a link to activate the account. Fill in and save the password information for the account.
Please note: if you have 2-factor authorisation enabled you will have to create app-specific password and use it as a password in devtodev. You can read detailed info in app-specific password here.
To create this password go to your apple id management dashboard:
Step 5 — Add App Store Console connection to devtodev
You can use the account created:
To add the new applications published in iTunes to devtodev system.
To integrate the previously added project with iTunes Connect.
Integration with Google Play. Adding Google Play Developer Console account with limited access.
Step 1 — Sign in Sign into the Google Play Developer Console
Step 2 — Managing Users From the Users and permissions , you can add users and manage their permissions
Click «Settings»
Select «Users and permissions»
Click «Invite new users»
Step 3 — Add New User Enter new user e-mail address
Set user permissions
Add access to View app information and download bulk reports (read-only) and View financial data, orders and cancellation survey responses
Step 4 — Activate new account After adding new user Google automatically sends an e-mail to validate new account. Click the link from the letter and follow further instructions.
Step 5 — Check reports availability
Please verify that you can download reports under this account, it can be done in Download reports -> Statistics section:
If you have reports available for download you can integrate Google Play in devtodev, otherwise - please check back later.
Go to Download reports -> Statistics and click Copy Cloud Storage URI link:
The URI is similar to this: gs://pubsite_prod_rev_00000000000000000000/stats/installs/ where pubsite_prod_rev_00000000000000000000 is your bucket ID.
To integrate AppGallery, please do the following.
On AppGallery’s side:
1. Sign in to AppGallery Connect and click Users and Permissions.
2. Go to API key > Connect API and click Create.
3. For Name, enter a custom client name. Set Project to N/A, select Operations, Development, and Finance roles, and click OK.
4. After the Client is successfully created, copy the values of Client ID and Key (Client Secret) from the client information list.
5. Also open Project settings > General information > App information and copy the App ID.
On devtodev’s side:
1. Open devtodev analytics.
2. Select your project.
3. Go to Settings -> 3rd party sources -> Huawei AppGallery.
4. Push “Integrate” button, "Edit" icon and insert App ID, Client ID and Client Secret (Key) obtained before.
5. Click Save and click on the tumbler if it is not turned on yet.
Go to your App dashboard and copy AdColony App ID:
Go to Settings and copy Read-Only API Key:
Copy corresponding fields into devtodev and enable integration:
You will need App Id and Reporting API Key to integrate Vungle. You can obtain these by visiting your app dashboard:
Add these values to devtodev Ad revenue settings and enable integration, that's it:
Go to API Library and find AdMob API:
Enable AdMob API:
Go to the OAuth consent screen in the left menu and create consent screen settings, fill in the Authorized domains field with devtodev.com:
Save credentials and copy Client ID and Client Secret:
Go to the list of your apps and copy App ID
Fill copied fields into devtodev and enable the integration:
Facebook integration is established by System user creation.
You will need App ID as well, it can be found on Dashboard screen:
After you have obtained Access token and App ID go to devtodev Ad revenue settings, copy values there and enable integration:
Next, go to the Credentials section in the left menu and create new OAuth credentials. Select Web application and copy JavaScript origin URI from devtodev settings - .
Go to and copy Publisher ID:
We created a special Ad revenue API endpoint to allow our customers to send information about revenue earned by ads displayed in their apps.
Do not apply this API if you use ad networks that utilize the server-server protocol for sending ad revenue data (ironSource, AppLovin MAX, and Fyber networks) and you already set up this method of data collection because if you use both data sources, your revenue data may be duplicated.
You need your project's API Key which can be obtained by going to 'Settings -> SDK -> Integration' section in the Application menu.
timestamp
true
Long
Ad display date, Unix timestamp in milliseconds
ad_network
true
String
Name of the ad network serving the impression
placement
false
String
Banner ad placement
ad_unit
false
String
Banner ad name
advertisingid
if devtodevid is missing
String
User Advertising ID
devtodevid
if advertisingid is missing
Long
User devtodev id if known
country
false
String
Country code, (ISO 3166 alpha 2)
revenue
true
Double
Reward for displaying the banner ad (in USD). The amount is shown for all impressions specified in the impressions field
impressions
false
Long
Number of impressions (for pre-aggregated data)
Example:
Valid query options:
POST:
2. POST:

You will need Organization Core Id, Game Id and Reporting API Key to integrate Unity Ads.
Go to Dashboard and click Settings in the left menu, you will find Organization Core Id in organization settings:
Go to Ads Data Export -> API access in the left menu next and create new Monetization Stats API Access key, this is your Reporting API Key:
Go to Projects -> Select your projects and click Settings -> Project settings in the left menu, you will find Game ID for corresponding platform here:
Now just copy these fields into devtodev settings and enable integration:
Export your cohorts to Google Ads and Facebook to use the audiences for ad targeting. To start the integration, open Settings → 3rd party sources → Cohort export.
Click the pen icon to sign in and allow devtodev to edit campaigns in the ad network.
Google Ads Configure the fields required for cohort synchronization: Specify Google Ads customerID. To find your customerID, go to the page.
Facebook Configure the fields required for cohort synchronization: Specify Ad Account ID. To find your Ad Account ID, go to the page.
The integration is finished. To cancel the integration with the ad cabinet, toggle it off:
