IOS
Integration with iOS push notification service
General information
To enable Push Notifications, please perform the following actions:
Add the application to your space in devtodev system
Generate Developer or Production Certificate for the application and get Private key file (.p12) on its basis
Submit the data to the application settings in devtodev system
Integrate devtodev SDK to the application (see the “SDK integration” division to learn more about integrating and initializing devtodev SDK)
Add several lines of the code to switch in the push notification to the SDK
Create a campaign for sending push notifications in “Push Notifications” section
Enabling Push Notifications and certificate generation
Enabling Push Notifications
First enable push notifications in your Xcode project.
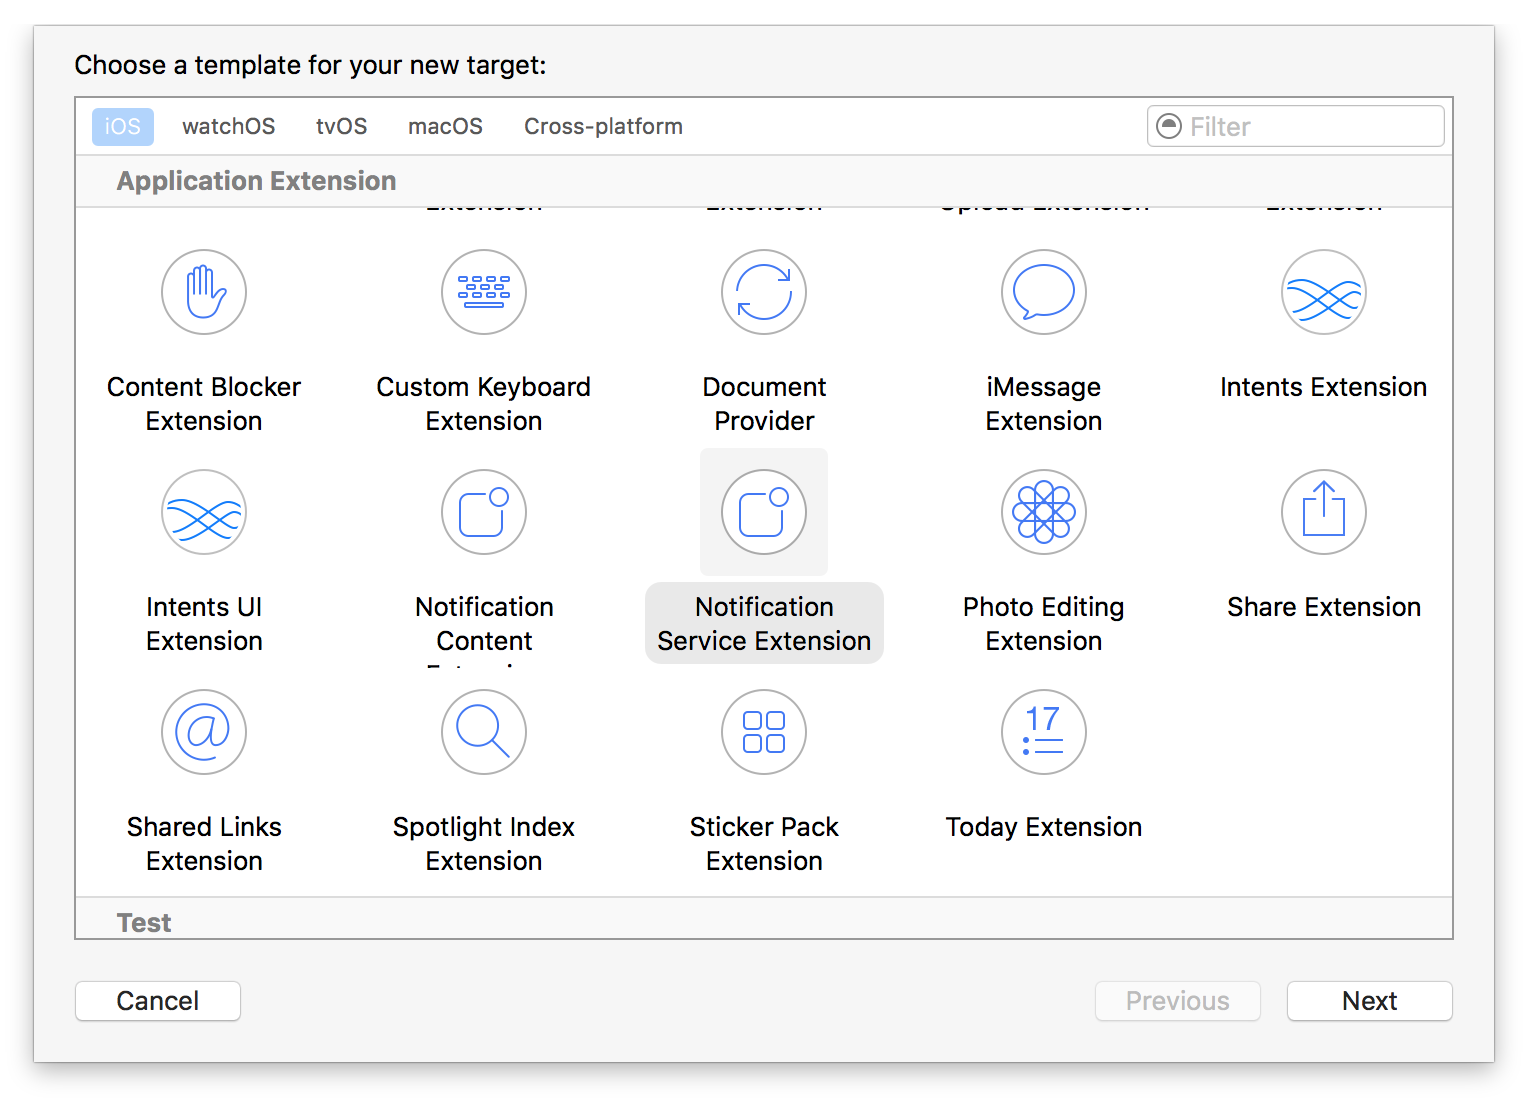
The library provides support for iOS 10 notification attachments, such as images, animated gifs, and video. In order to take advantage of this functionality, you will need to create a notification service extension alongside your main application.
Create a new iOS target in Xcode (File -> New -> Target) and select the Notification Service Extension type.
In Member Center, the Push Notifications service will appear as Configurable (not Enabled) until you create a client SSL certificate.
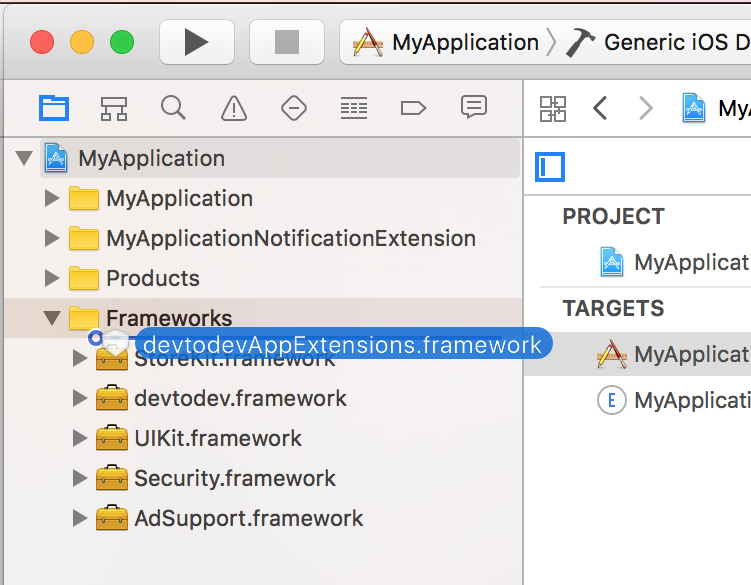
Drag the devtodevAppExtensions.framework into your app project.
Modify your extension.
Delete all dummy source code for your new extension
Inherit from DTDMediaAttachmentExtension in NotificationService
Adding Capabilities
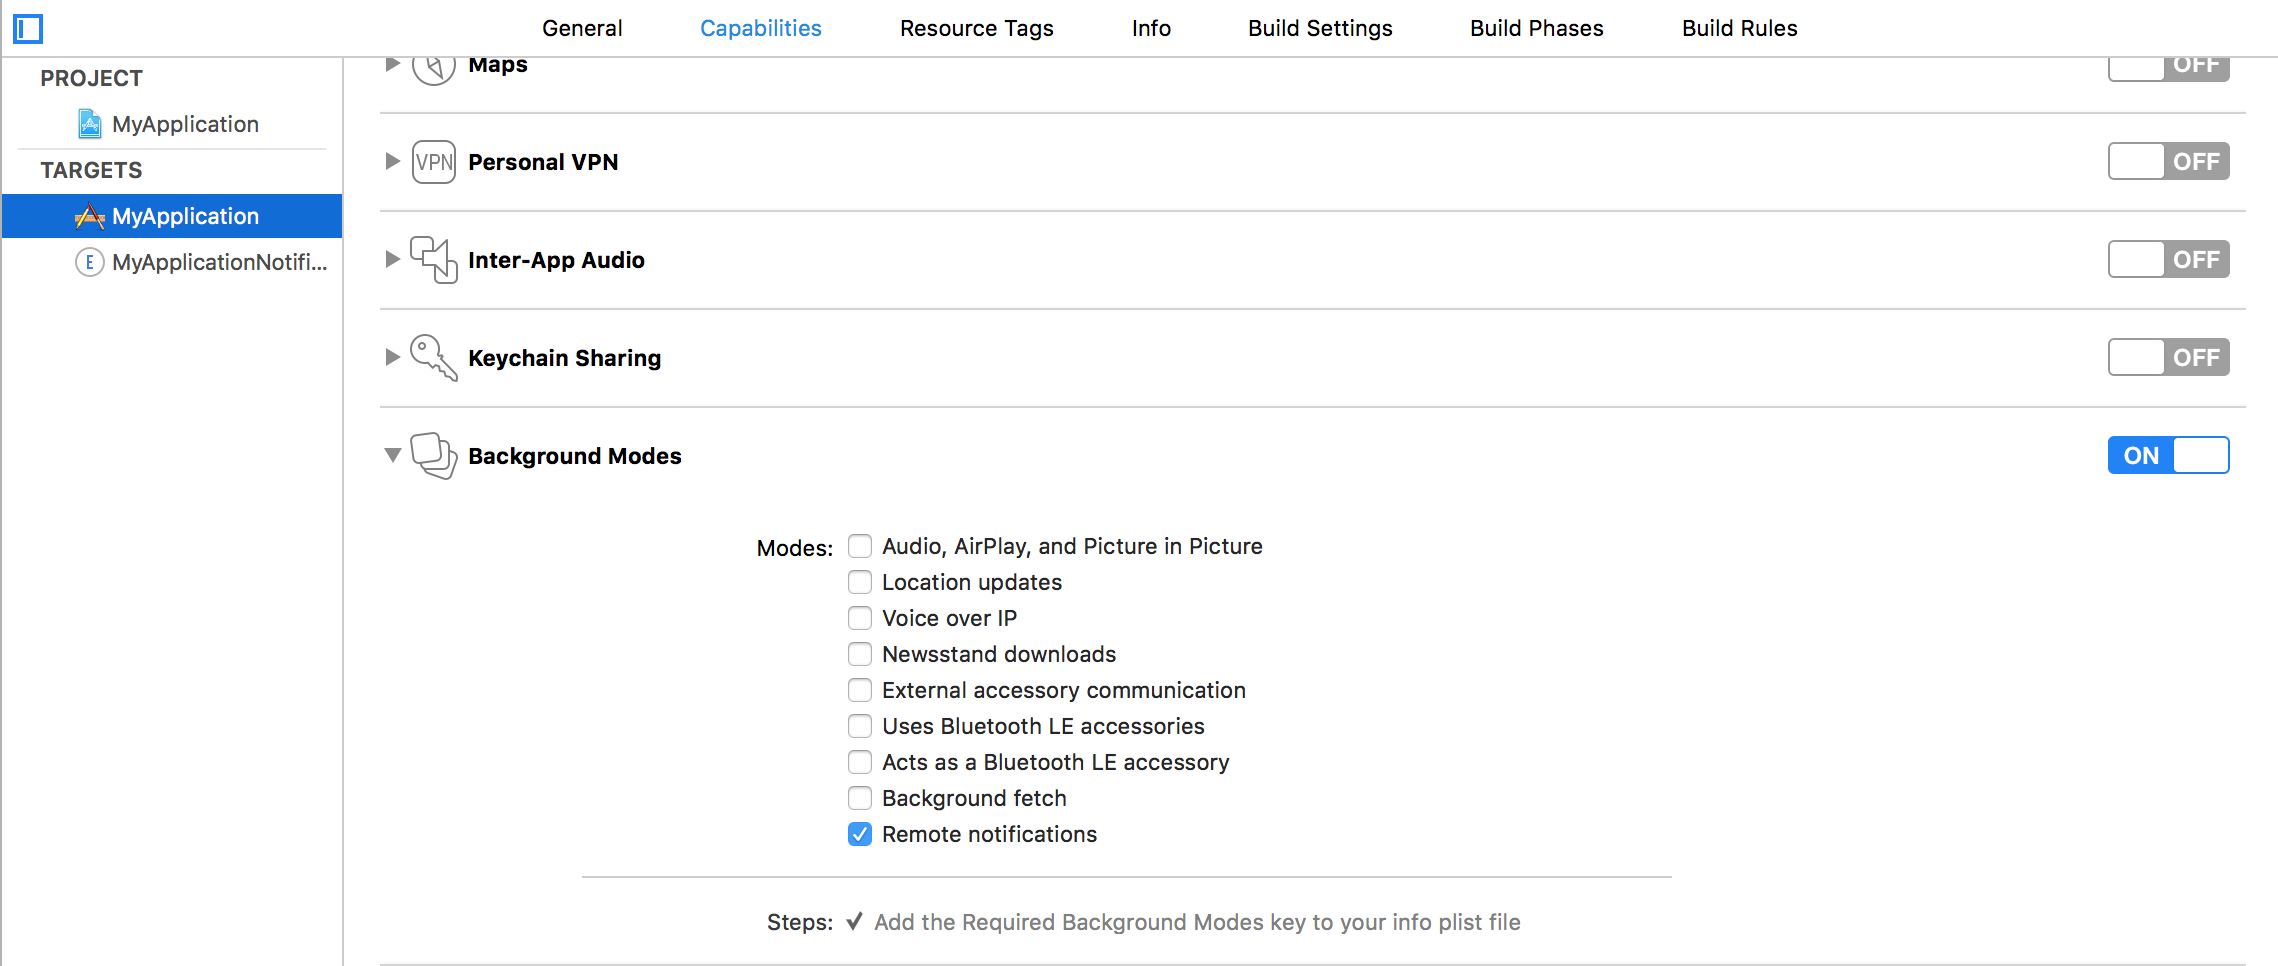
Use Xcode to enable push notifications in the target’s Capabilities pane:

Enable Background Modes and Remote notifications under the target’s Capabilities section:
Creating a Universal Push Notification Client SSL Certificate
You use Member Center to generate a push notification client SSL certificate that allows your notification server to connect to the APNs. Each App ID is required to have its own client SSL certificate. The client SSL certificate Member Center generates is a universal certificate that allows your app to connect to both the development and production environments.
Only a team agent or admin can generate Apple Push Notification service SSL certificates.
To generate a universal client SSL certificate
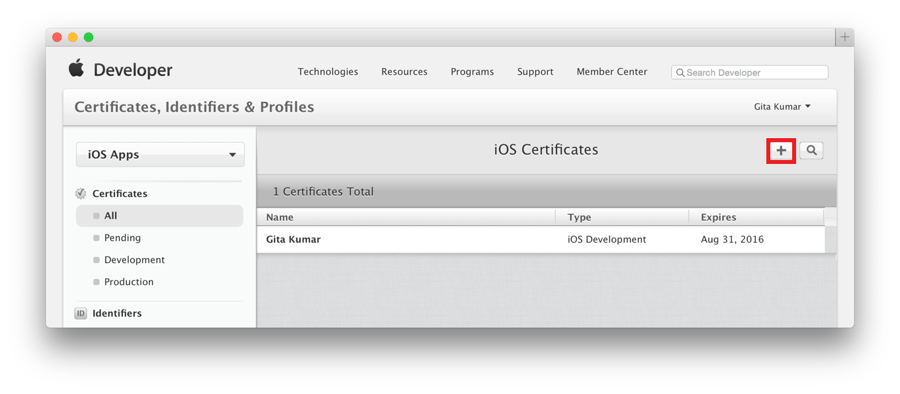
In Certificates, Identifiers & Profiles, select Certificates.
Click the Add button (+) in the upper-right corner.
Under Production, select the “Apple Push Notification service SSL (Sandbox & Production)” checkbox, and click Continue.
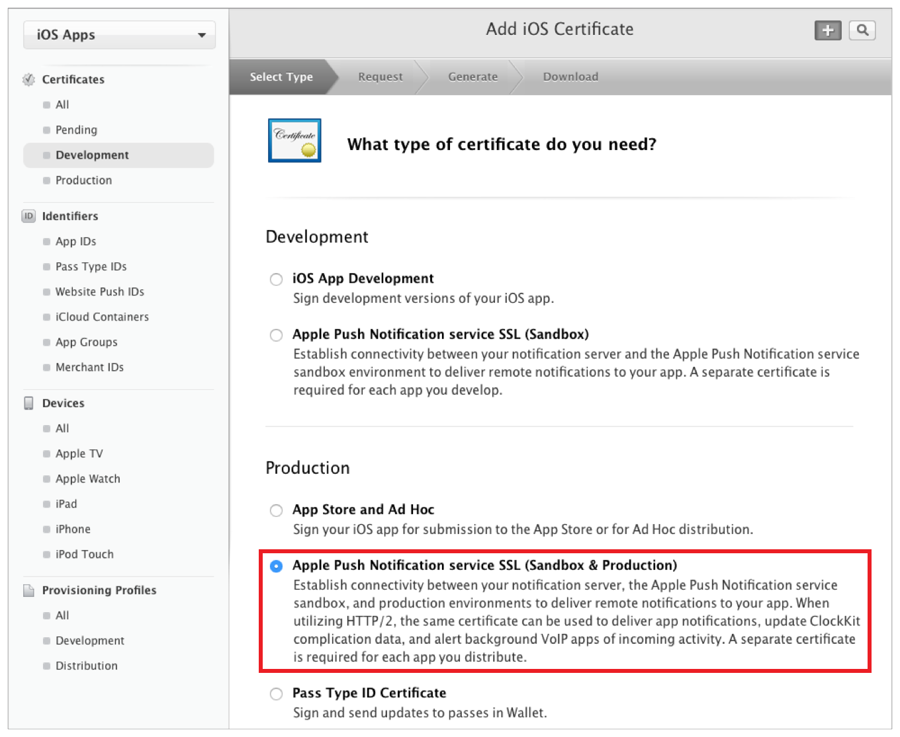
Choose an App ID from the App ID pop-up menu, and click Continue. Choose the explicit App ID that matches your bundle ID.
Follow the instructions on the next webpage to create a certificate request on your Mac, and click Continue.
Click Choose File.
In the dialog that appears, select the certificate request file (with a .certSigningRequest extension), and click Choose.
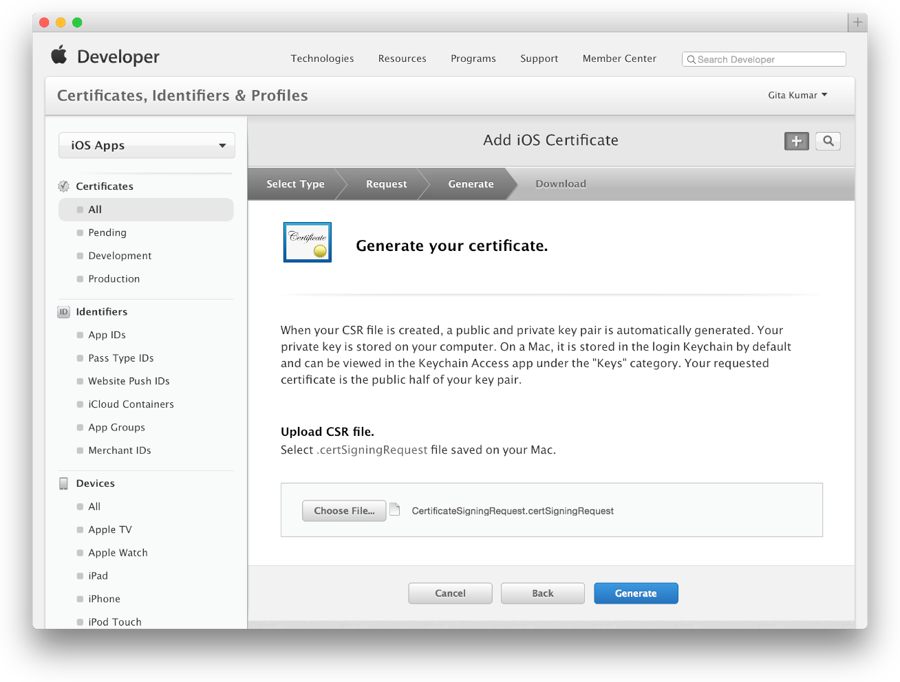
Click Generate.
Click Download.
Follow these steps to export the certificate from Apple web-site to the P12-file:
Open "Keychain access" application
If the certificate hasn't been added to keychain access yet, choose "File" → "Import". Find the certificate file (CER-file) provided by Apple
Choose "Keys" section in "Keychain access" application
Choose a personal key associated with your iPhone developer certificate. Personal key is identified by open certificate associated with it "iPhone developer: ". Choose "File" → Export objects. Save key as .p12
You'll be suggested to create a password which is used when you need to import the key to another computer
Convert the certificate from Apple web-site to the P12-file on Windows OS
Convert Apple certificate file to the PEM-file. Start following command-line operation from bin catalog OpenSSL.
Convert personal key from Mac OS keychain to the PEM-key:
Now you are able to create P12-file using PEM-key and iPhone developer certificate:
If you are using key from Mac OS keychain then choose PEM-version created in the previous step. Otherwise, you can use OpenSSL key for Windows OS.
Upload the certificate to the site
Upload the .p12-file into Integration section of application settings panel (Settings -> Push Notifications):

SDK Integration
After the certificate has been generated you can start to integrate Push SDK into your app.
1. Open the "Capabilities" tab in the XCode. Switch "Push Notifications" and "Background Modes" to ON. In "Background Modes" check "Remote notifications".
2. Add the following strings to the AppDelegate class:
If you are using iOS 12 or above, you can specify custom options for notification settings:
3. Open "Build Settings", find the parameter "Other Linker Flags", then add 2 flags: -ObjC and -lc++

4. Compile and run the app. You will need a device because the simulator does not support push notifications. Xcode will automatically choose a new provisioning profile. If an error occurred during the launch make sure that there is a correct profile set in the Code Signing Identity. You'll be asked to confirm push notifications. An app will request permission only once, if user confirms it - notifications will be accepted otherwise he won't get any push messages from your app. Users can change it in device settings.
Creating a new push notification in devtodev interface
1. Open PUSH NOTIFICATIONS section and click on the "Add new campaign" button

2. Fill in the campaign name
You can create a campaign only after at least one push token comes from devtodev SDK integrated into your application. Otherwise, the app will not be displayed in the list.

3. Choose a user group to send a message. You can choose an existing segment or create a new one

4. Enter notification details

5. Test push notification (or skip this step)

6. Confirm push gateway

7. Schedule the delivery

8. That's it!
Last updated
Was this helpful?
