Windows 8.1 and Windows 10
Integration of push notifications on Windows 8.1 and Windows 10
General information
To enable Push Notifications you will have to perform the following actions:
Add the application to your space in devtodev system
Activate Windows Messaging Service ang get SID and Client Secret values
Add SID and Client Secret to the application integration settings in devtodev system
Integrate devtodev SDK to the application (see the "SDK integration" section to learn more how to integrate and initialize devtodev SDK)
Add several lines of the code to switch on the push notification in the SDK
Create a campaign for sending push notifications in "Push" section
How to get SID and Client Secret
Go to the application settings in your Windows Store dashboard
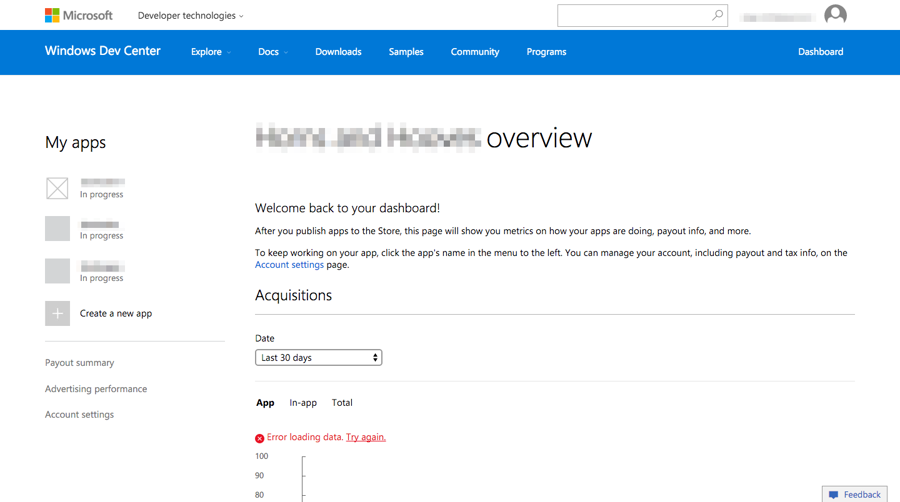
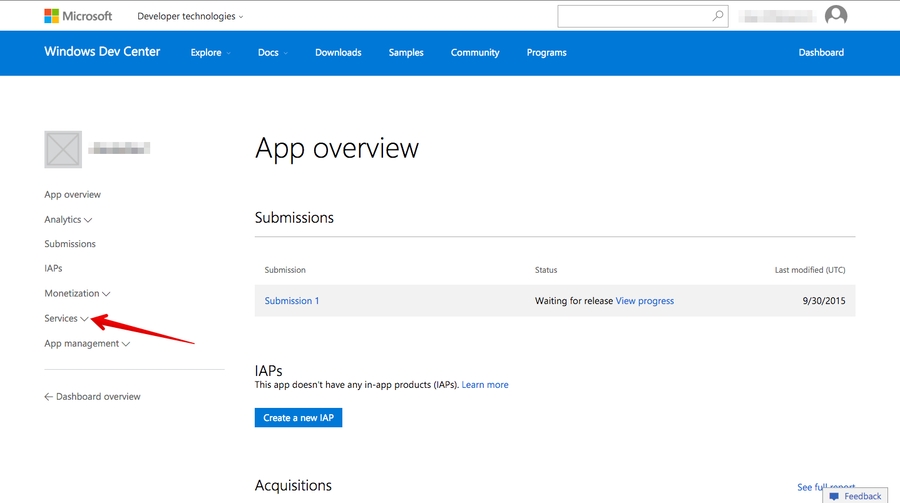
Open Push Notifications submenu in Services menu
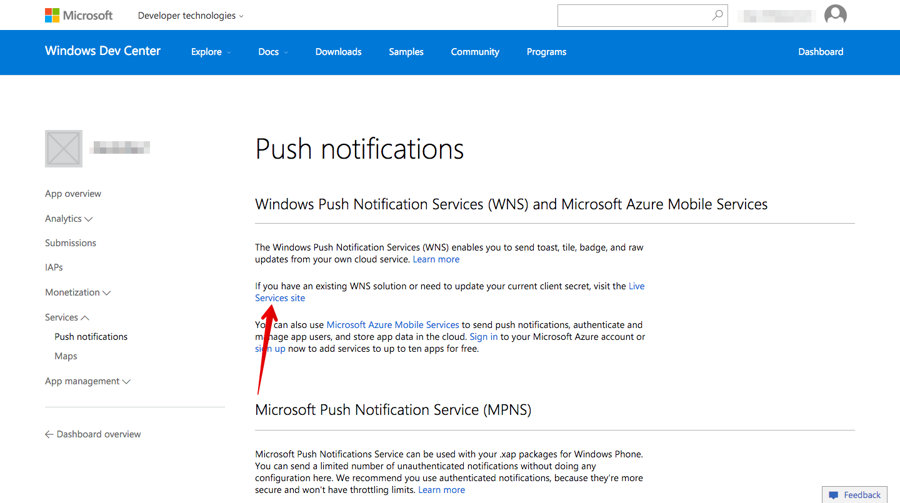
Go to Live Services site:
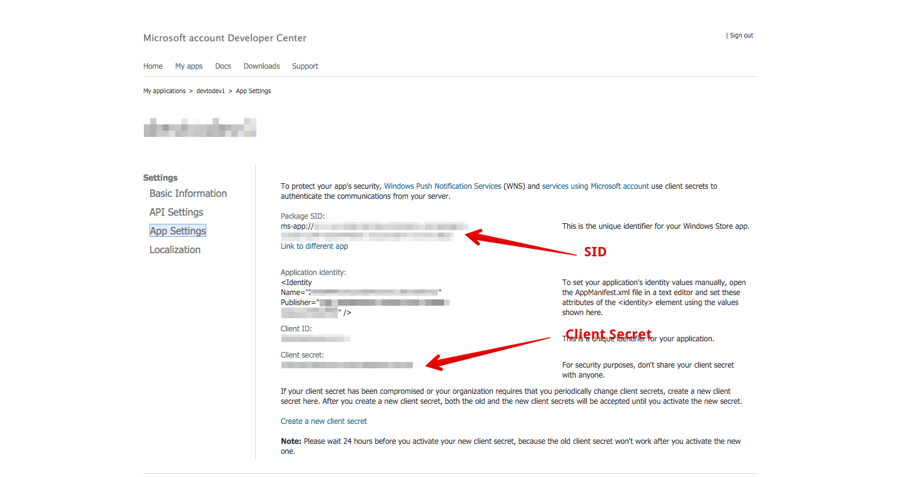
"Package SID" and "Client secret" will be your SID and Client Secret strings respectively
Implementation to app
Integrate devtodev SDK to your project. Even if you don't need devtodev analytics in your app, you should call DevToDev.SDK.Initialize(string appKey, string appSecret).
Add the following source after DevToDev.SDK.Initialize(string appKey, string appSecret) is called:
The PushType can have one of the following values:
The control of the current value of a badge. When an app is launched the current value of a badge is reset to zero by default. In order to disable automatic resetting to zero and manually control the value of a badge use the following methods:
Attention! There is a difference in the implementation of the elements mentioned below for Windows 8.1+ and Windows 10+ projects.
Windows 8.1+: Put the following source in your Application class (usually it is App.xaml.cs file) at the end of the OnLaunched(LaunchActivatedEventArgs e) function. For Example:
Windows 10+: Put the following source in your Application class (usually it is App.xaml.cs file) at the end of the OnLaunched(LaunchActivatedEventArgs e) and OnActivated(IActivatedEventArgs args) functions. For Example:
Make sure that these functions are enabled in Package.appmanifest of you project (the flag "Toast capable" is enabled by default for Windows 10+ projects, it is absent in the manifest).
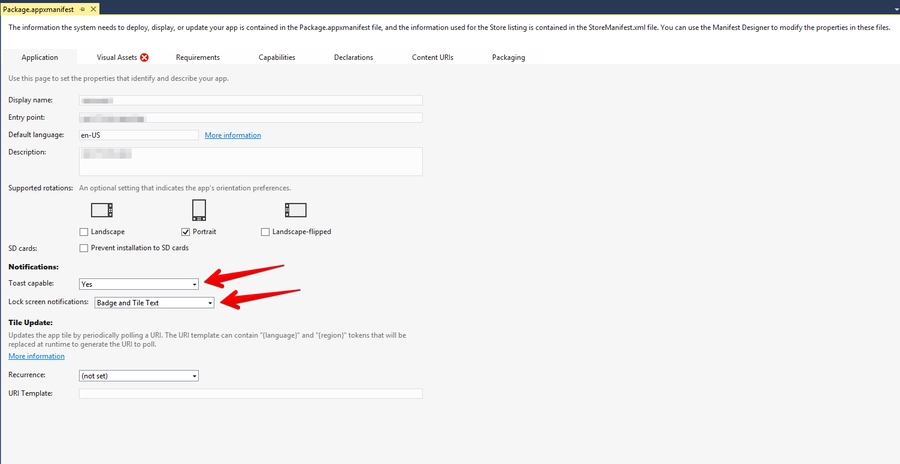
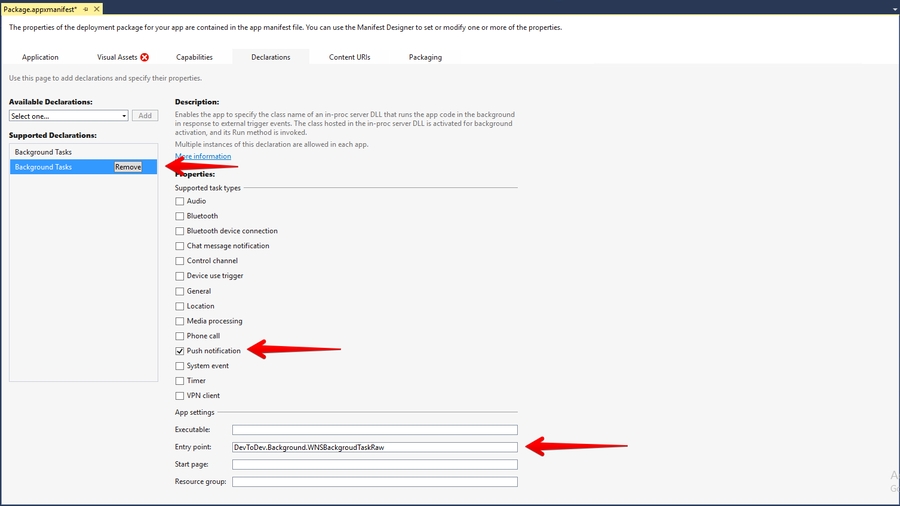
Add the following two Background Tasks in Package.appmanifest:

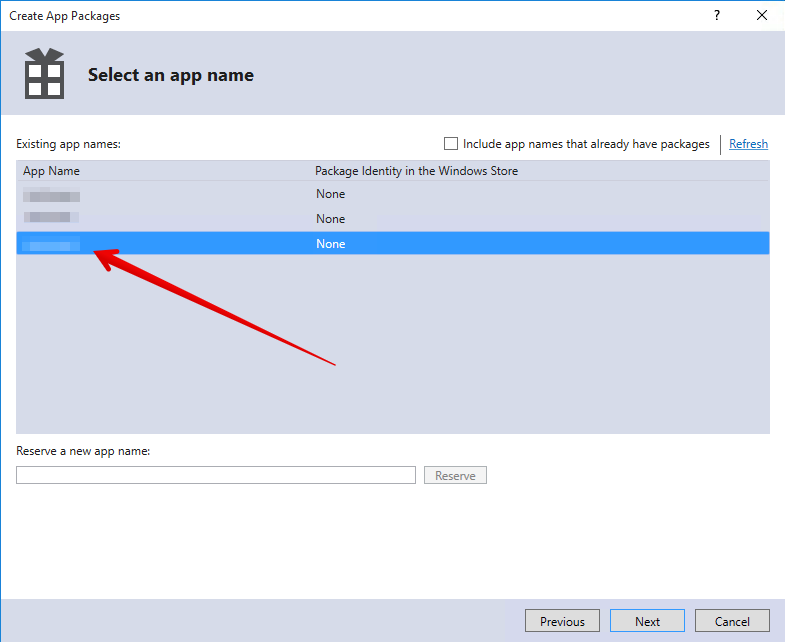
Keep in mind that your application must be built with the same Windows Store preferences you used in Chapter 3.2. In the "Create App Packages" window you have to log in with your Live ID and pick the appropriate application form the list. A file Package.StoreAssociation.xml will be added into the Project.
Changing the application settings in devtodev system
1. Proceed to Settings of your app.

2. Go to PUSH NOTIFICATIONS page in Settings and insert the previously received Package SID and Client secret to appropriate fields in Push notifications section.
3. If the Package SID and Client secret are correct, you will see the following result:

Creating a new push notification in devtodev interface
Open PUSH NOTIFICATION section and click on "Add new campaign" button
Fill in campaign name, select an app for delivery*
Choose the user group to send a message. You can choose existing segment or create a new one
Enter toast or tile details
Schedule the delivery
That's it!
*Attention! You can create a campaign only after at least one push token comes from devtodev SDK integrated to your application. Otherwise the app will not be displayed in the list.
Last updated
Was this helpful?
