Unity
This generation of SDK is deprecated and is no longer supported. Information about the current version can be found here.
Push Notifications are available only for the supported platforms: iOS, Android, Windows Store/Windows Phone 8.1/10.
To enable Push Notifications you will have to perform the following actions:
Add the application to your space in devtodev system
Android. Get API key from Google APIs Console. It is necessary to activate Google Cloud Messaging for Android before key generation. Detailed information on how to receive an API key you can find in native Android devtodev SDK documentation
iOS. Generate Developer or Production Certificate for the application and get Private key file (.p12) on its basis. Detailed information on how to receive a Private key file you can find in native iOS devtodev SDK documentation
Submit the data to the application settings in devtodev system
Integrate devtodev SDK to the application (see the "SDK integration" to learn more about integrating and initializing devtodev SDK)
Add several lines of the code to switch in the push notification to the SDK
Create a campaign for sending push-notifications in "Push" section
SDK Integration
Android platform features:
Go to Firebase console and then to your project or create a new one. Here is complete guide on adding your project to Firebase console and enabling Cloud messaging.
Download google-services.json from your Firebase console. Add this file into your project’s Assets folder.
Please do the following to find google-services.json:
Choose your project in the Firebase console
Choose project settings in the Project overview

3. Scroll down to the SDK setup and configuration. Click on the google-services.json

Using devtodev and Firebase Messaging services at the same time
If you want to use both devtodev and Firebase Messaging services at the same time, you need to disable Firebase listener.
Find androidmanifest.xml used in your app. If you don’t use Custom Manifest, you need to create it. Tick the Custom Main Manifest checkbox:

You can read more about the manifest here.
Add the following line to the “Application” section:
You should get something like this:
Windows Store 10 platform features:
Build a Windows Store App in Unity. After the app is built, Visual Studio project will be created. Proceed with the following changes.
There is a difference in the implementation of the elements mentioned below for different types of projects:
.NET + D3D: Put the following source in your App class (usually it is an App.cs file) at the end of the ApplicationView_Activated(CoreApplicationView sender, IActivatedEventArgs args) function.
.NET + XAML: Put the following source in your App class (usually it is an App.xaml.cs file) at the end of the OnLaunched(LaunchActivatedEventArgs args) and OnActivated(IActivatedEventArgs args) functions.
IL2CPP + XAML: Put the following source in your App class (usually it is App.xaml.cpp file). Add several lines of code in a generated App.xaml.cpp class. After defining headers:
And at the end of of the App::OnLaunched(LaunchActivatedEventArgs^ e) and App::OnActivated(IActivatedEventArgs^ args) functions.
For Example:
IL2CPP + D3D: Put the following source in your App class (usually it is App.cpp file). Add several lines of code in a generated App.cpp class. After defining headers:
And at the end of of the App::OnActivated(CoreApplicationView^ sender, IActivatedEventArgs^ args) function.
Make sure that these functions are enabled in Package.appmanifest of you project (the flag "Toast capable" is enabled by default for Windows 10+ projects, it is absent in the manifest).
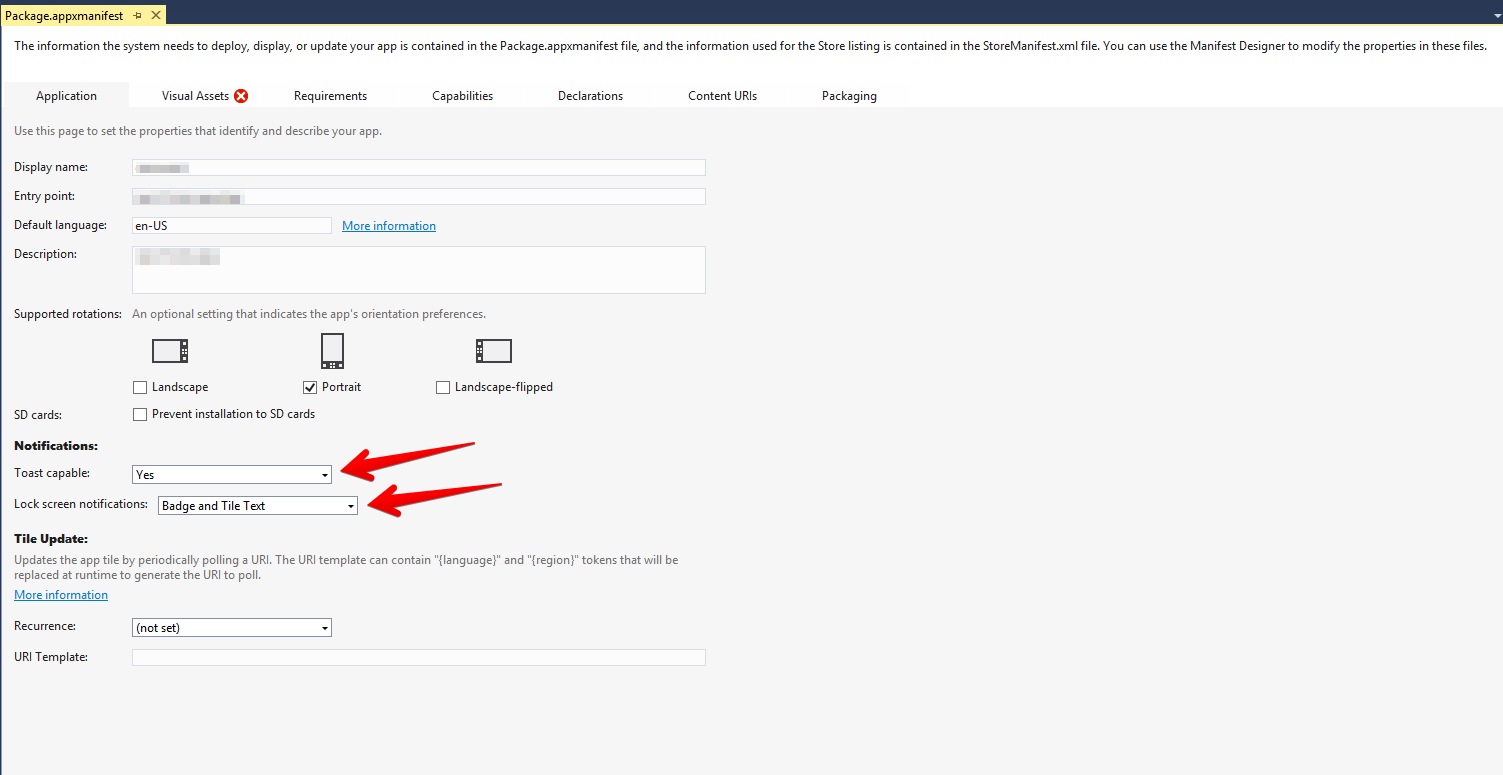
Add the following three Background Tasks in Package.appmanifest:
Entry point for Push Notification tasks type:
Entry points for System Event tasks type:
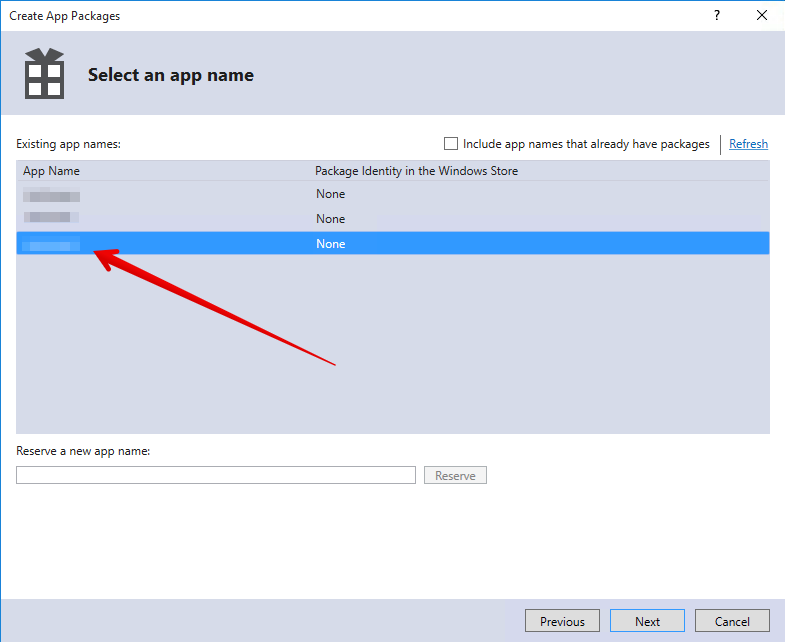
You must also associate your application with the Windows Store app (otherwise push notifications will not be delivered). Open "Store->Associate App with the Store" menu, login with your Live ID and pick the appropriate application form the list. A file Package.StoreAssociation.xml will be added into the Project.
The specificity of integration on iOS platform
Build an iOS App in Unity. After the app is built, Xcode project will be created. Proceed with the following changes
Enable push notifications in your Xcode project
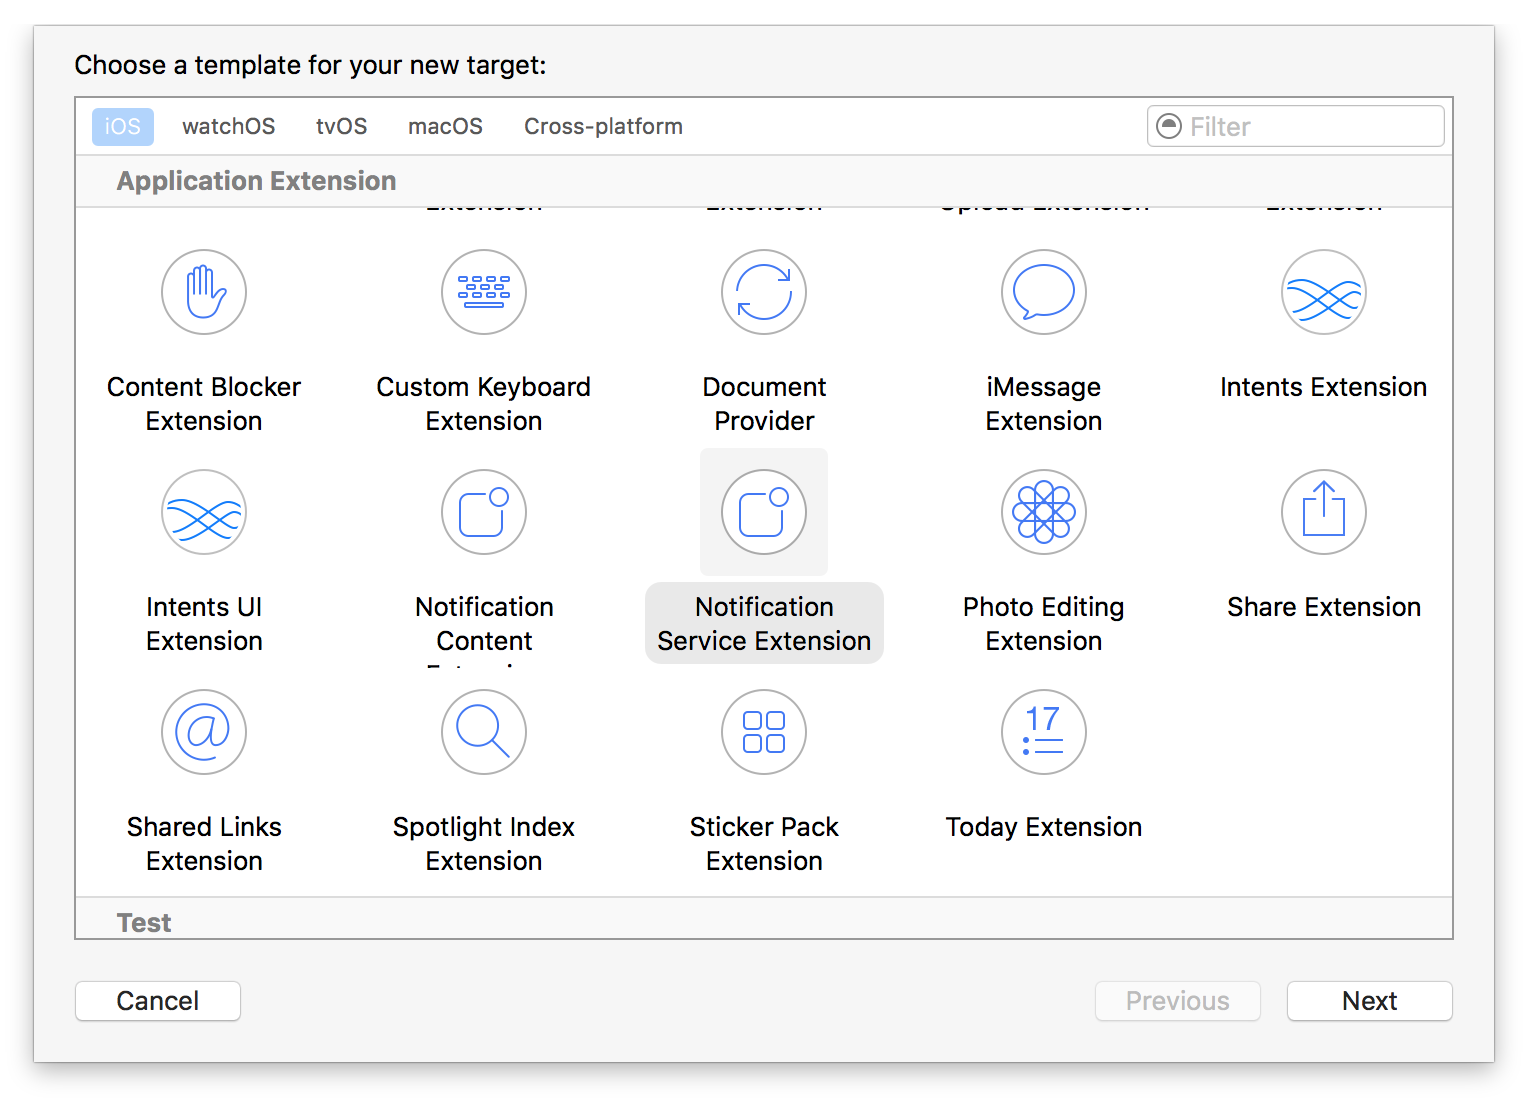
The library provides support for iOS 10 notification attachments, such as images, animated gifs, and video. In order to take advantage of this functionality, you will need to create a notification service extension alongside your main application
Create a new iOS target in Xcode (File -> New -> Target) and select the Notification Service Extension type
In Member Center, the Push Notifications service will appear as Configurable (not Enabled) until you create a client SSL certificate
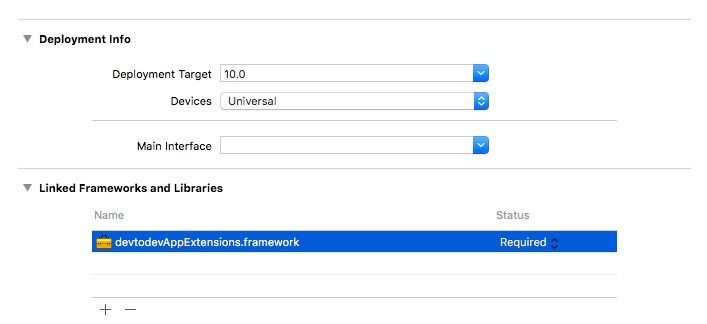
Add devtodevAppExtensions.framework to newly created extension. Make sure that Deployment Target is pointed as iOS 10.0 or higher:
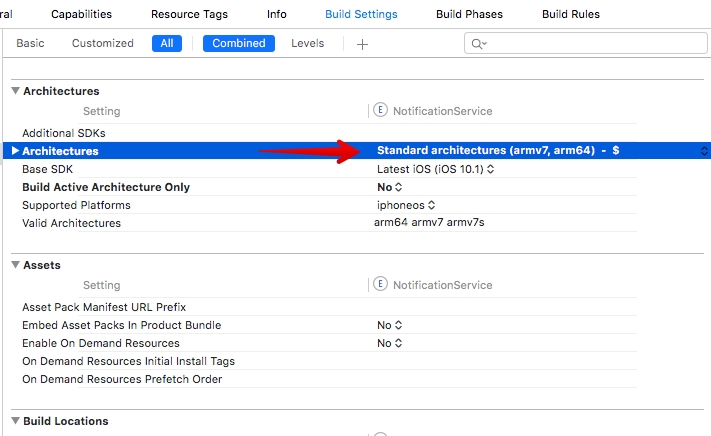
Make sure that field Architectures contains "Standard architectures armv7, arm64" setting both in the project and the extension build settings:
Modify your extension:
Delete all dummy source code for your new extension
Inherit from DTDMediaAttachmentExtension in NotificationService
Adding Capabilities
Use Xcode to enable push notifications in the target’s Capabilities pane:

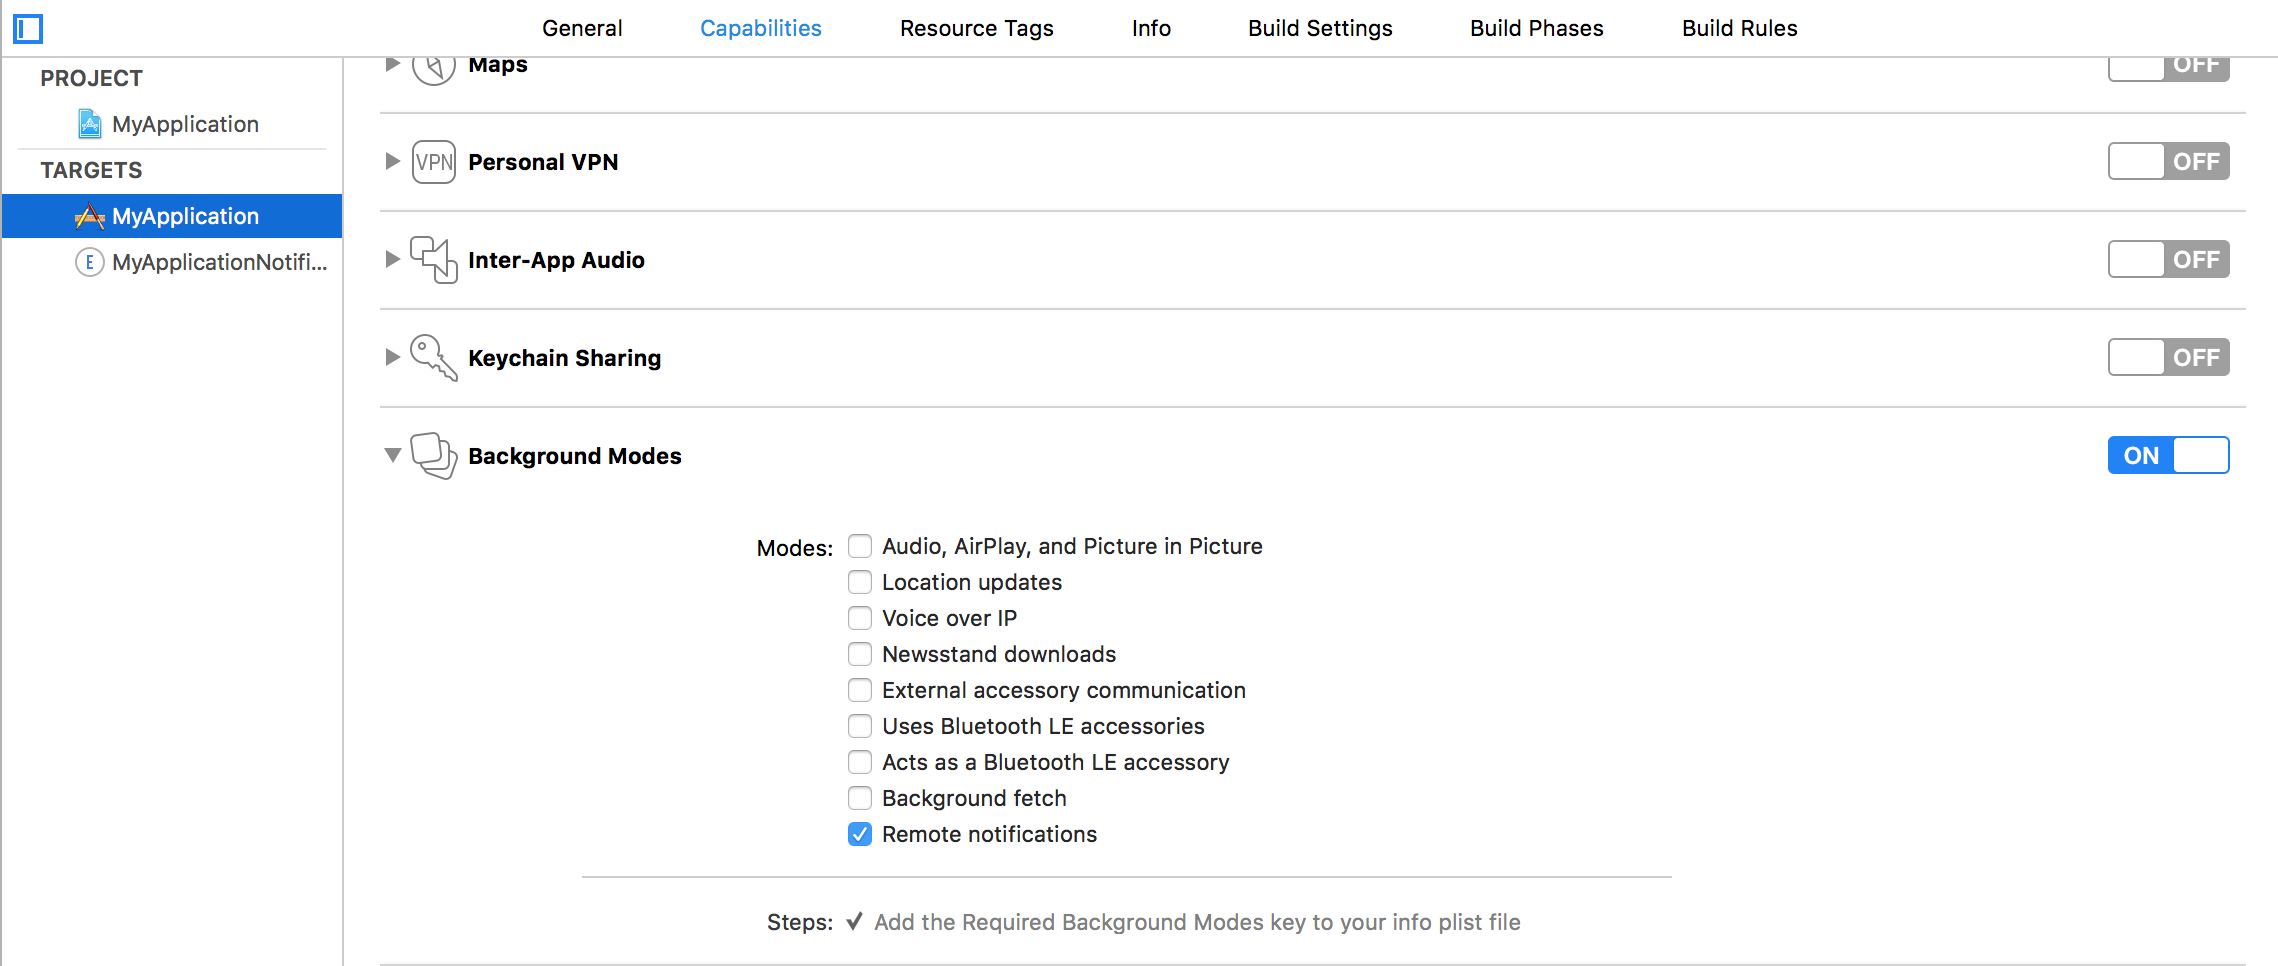
Enable Background Modes and Remote notifications under the target’s Capabilities section:
Two ways to integrate push notifications:
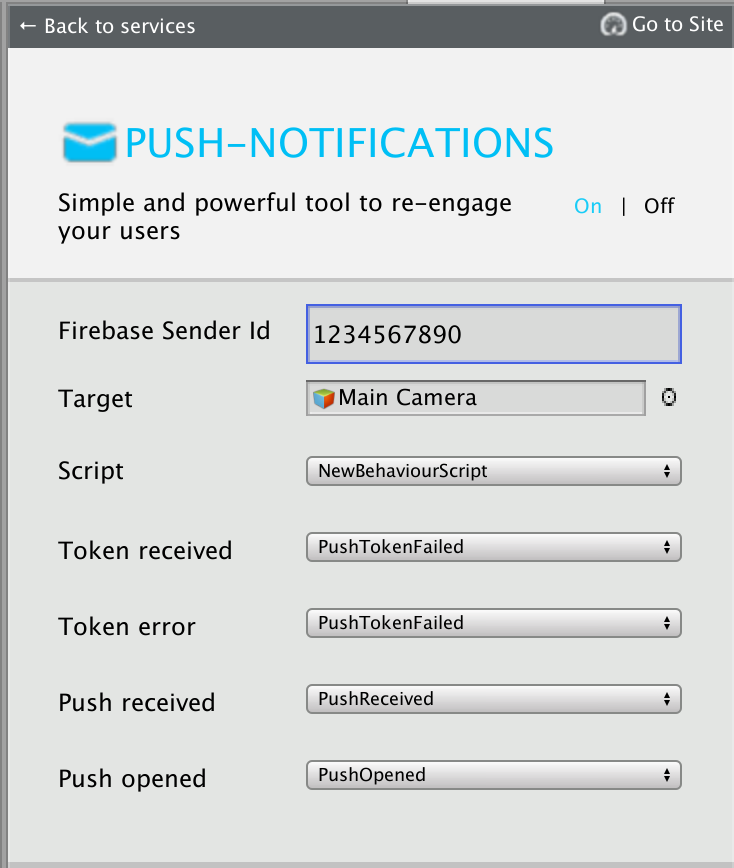
Using the graphic interface:
Open the Window/devtodev menu element
Switch Push Notifications tumbler on
If you need to use push token for some aims or to handle the getting of notifications by user, add the GameObject with the following function to the scene:
Using code: Before calling Analytics.Initialize add the following strings:
Creating a new push-notification in devtodev interface
1. Open PUSH NOTIFICATIONS section and click on the "Add new campaign" button

2. Fill in the campaign name, select an app for delivery 3. Choose a user group to send a message. You can choose an existing segment or create a new one 4. Enter notification details 5. Schedule the delivery 6. That's it!
You can create a campaign only after at least one push token comes from devtodev SDK integrated into your application. Otherwise, the app will not be displayed in the list.
Last updated
Was this helpful?

