Abode Air
Integration of push notifications on Android and iOS using devdodev SDK for Adobe Air
This generation of SDK is deprecated and is no longer supported.
Push Notifications are availible only for iOS and Android.
Android push notifications
Obtaining configuration file for firebase push notifications
Go to Firebase console and then to your project or create a new one.
Current project:
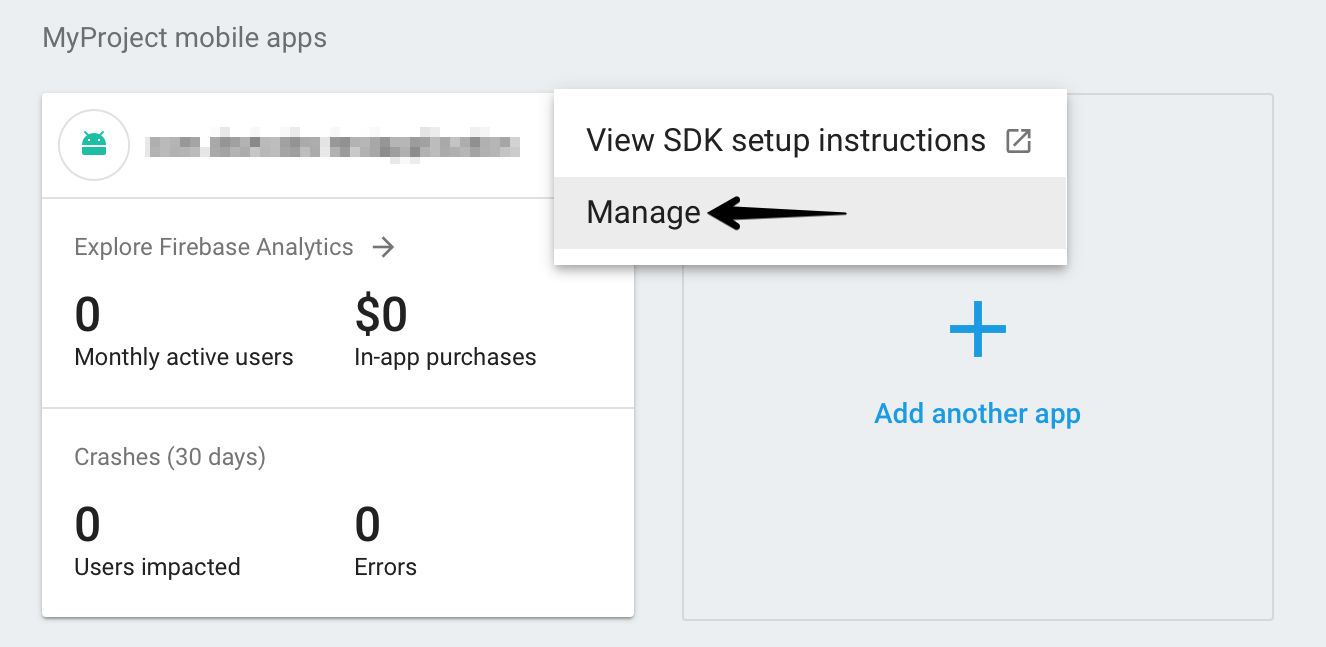
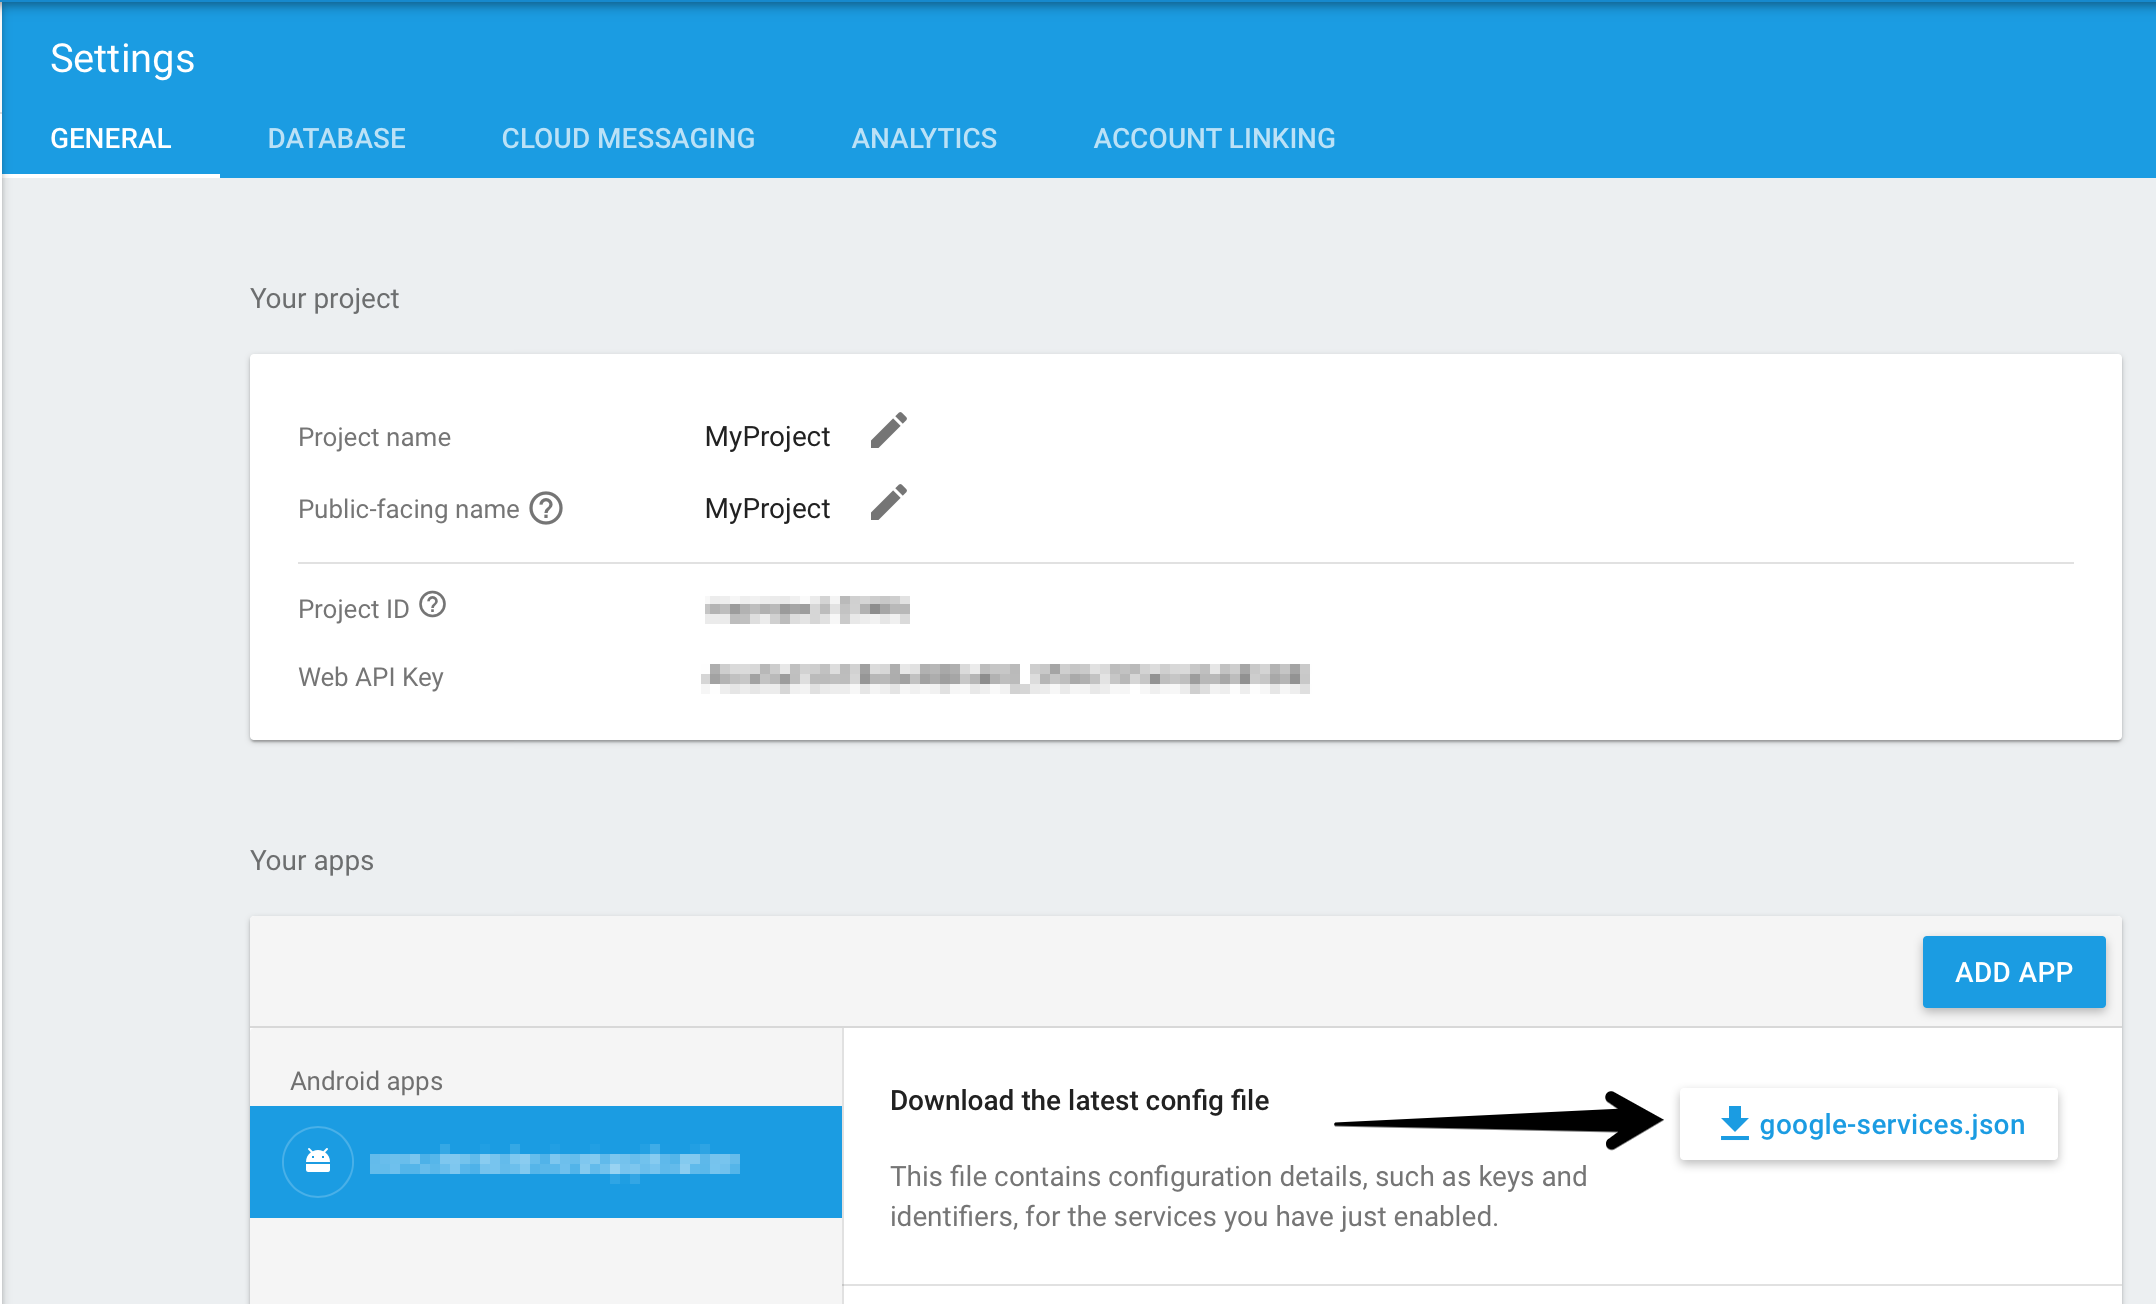
New project:
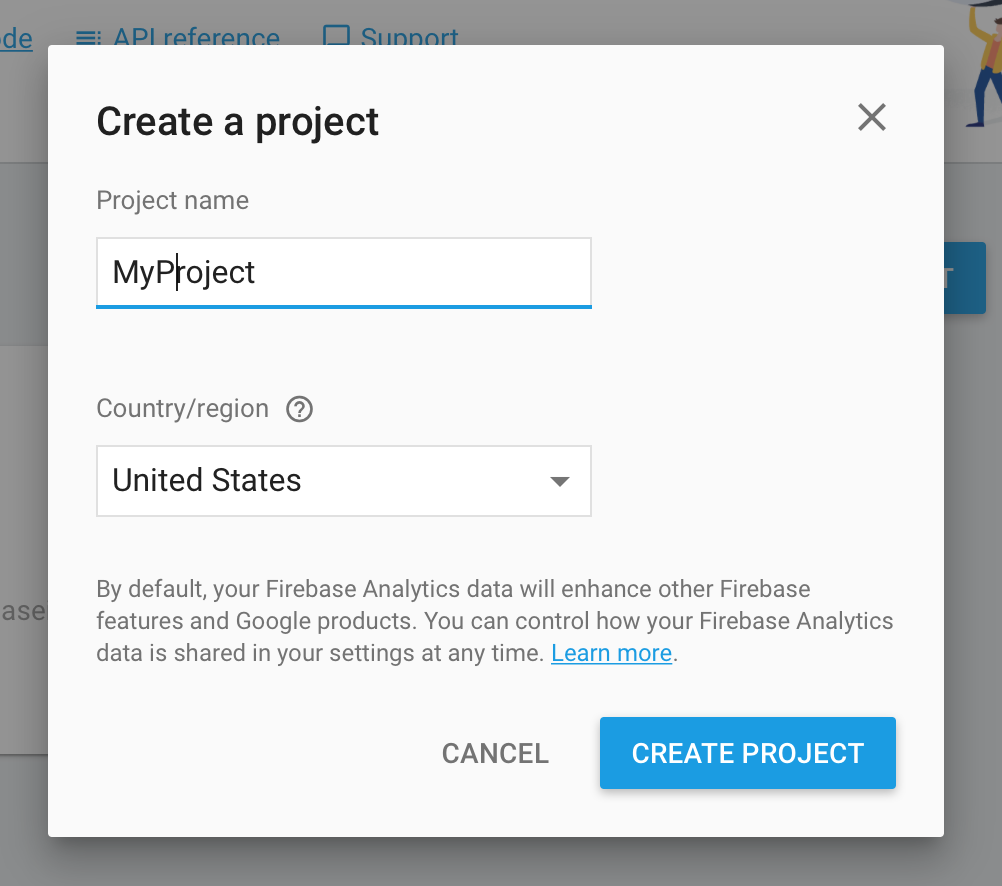
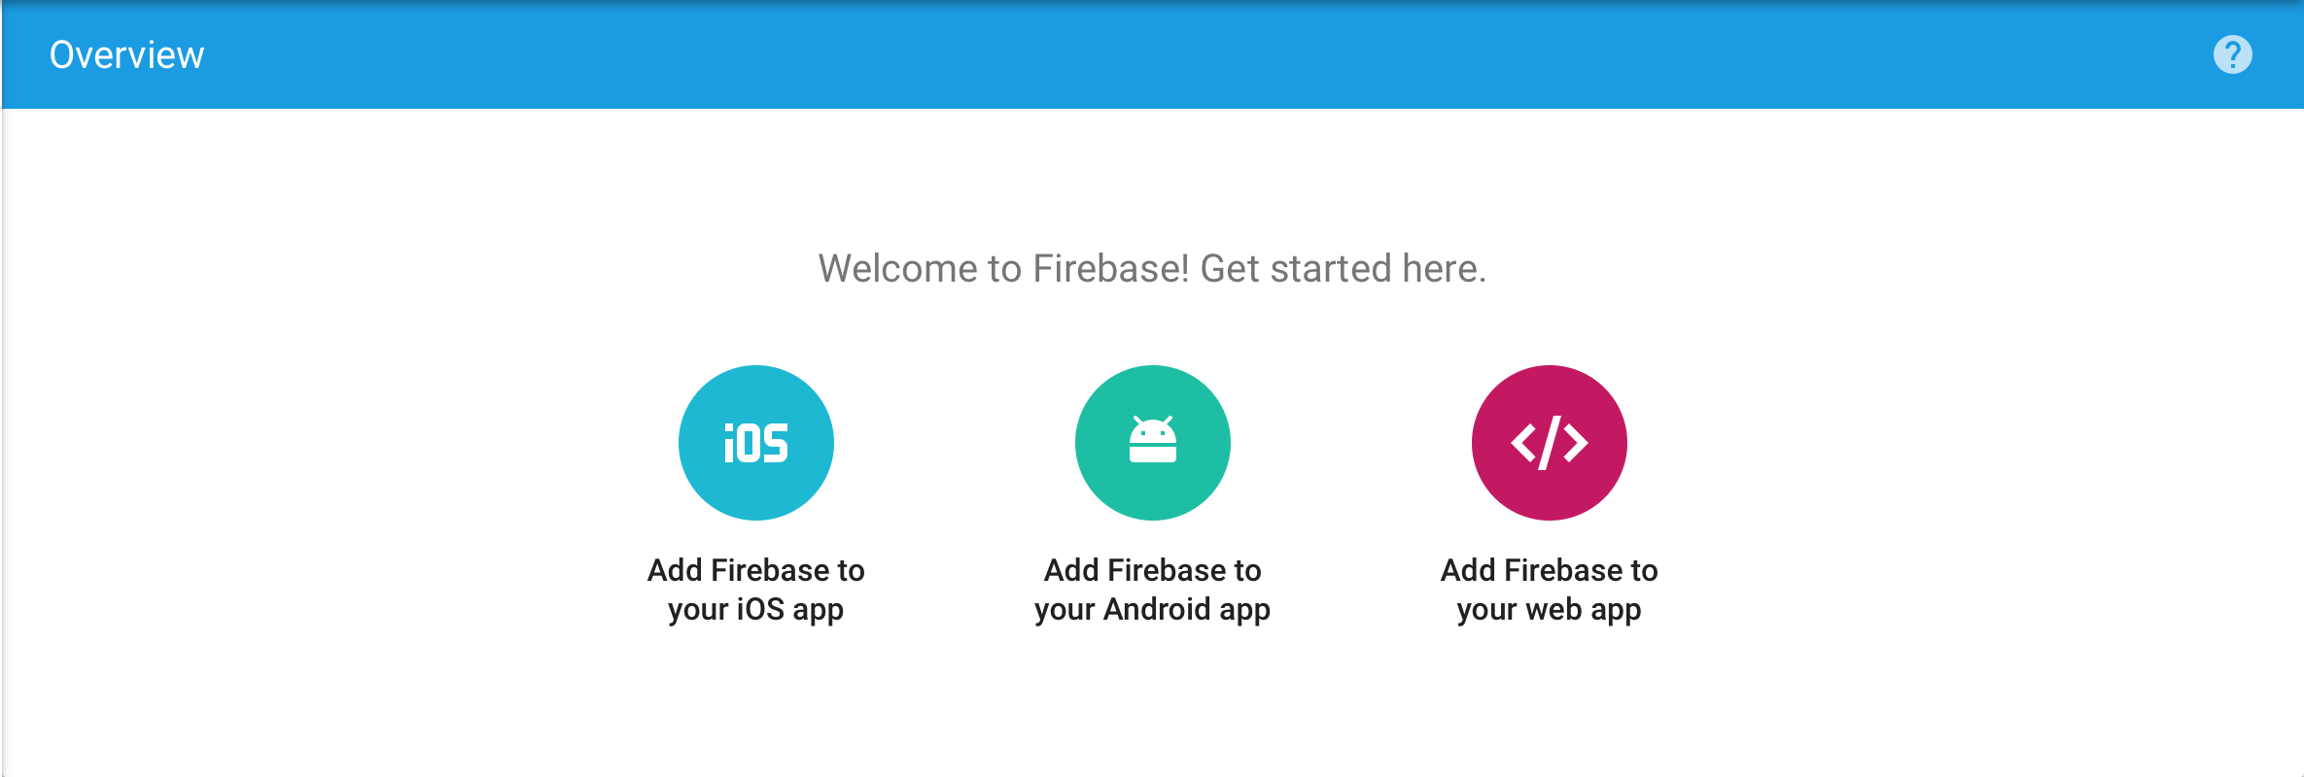
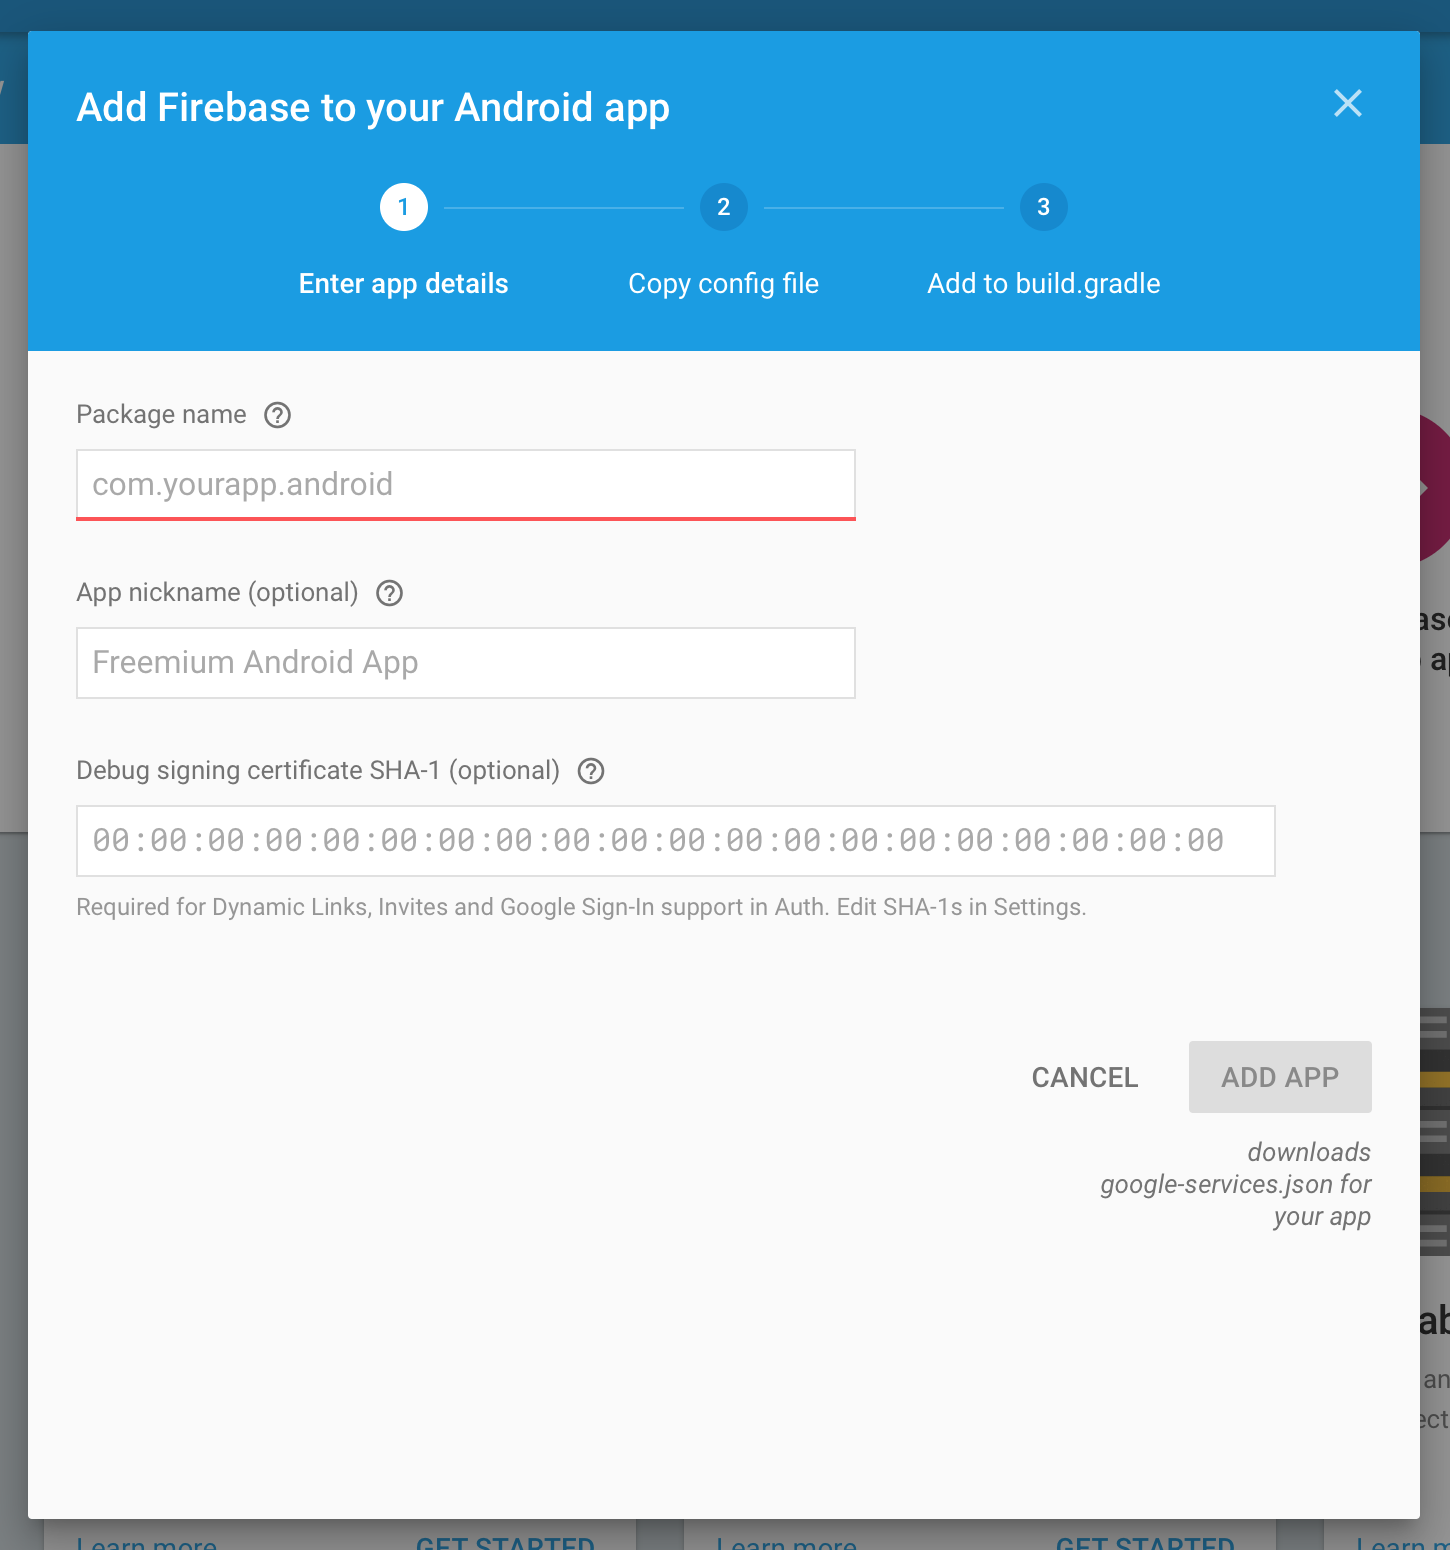
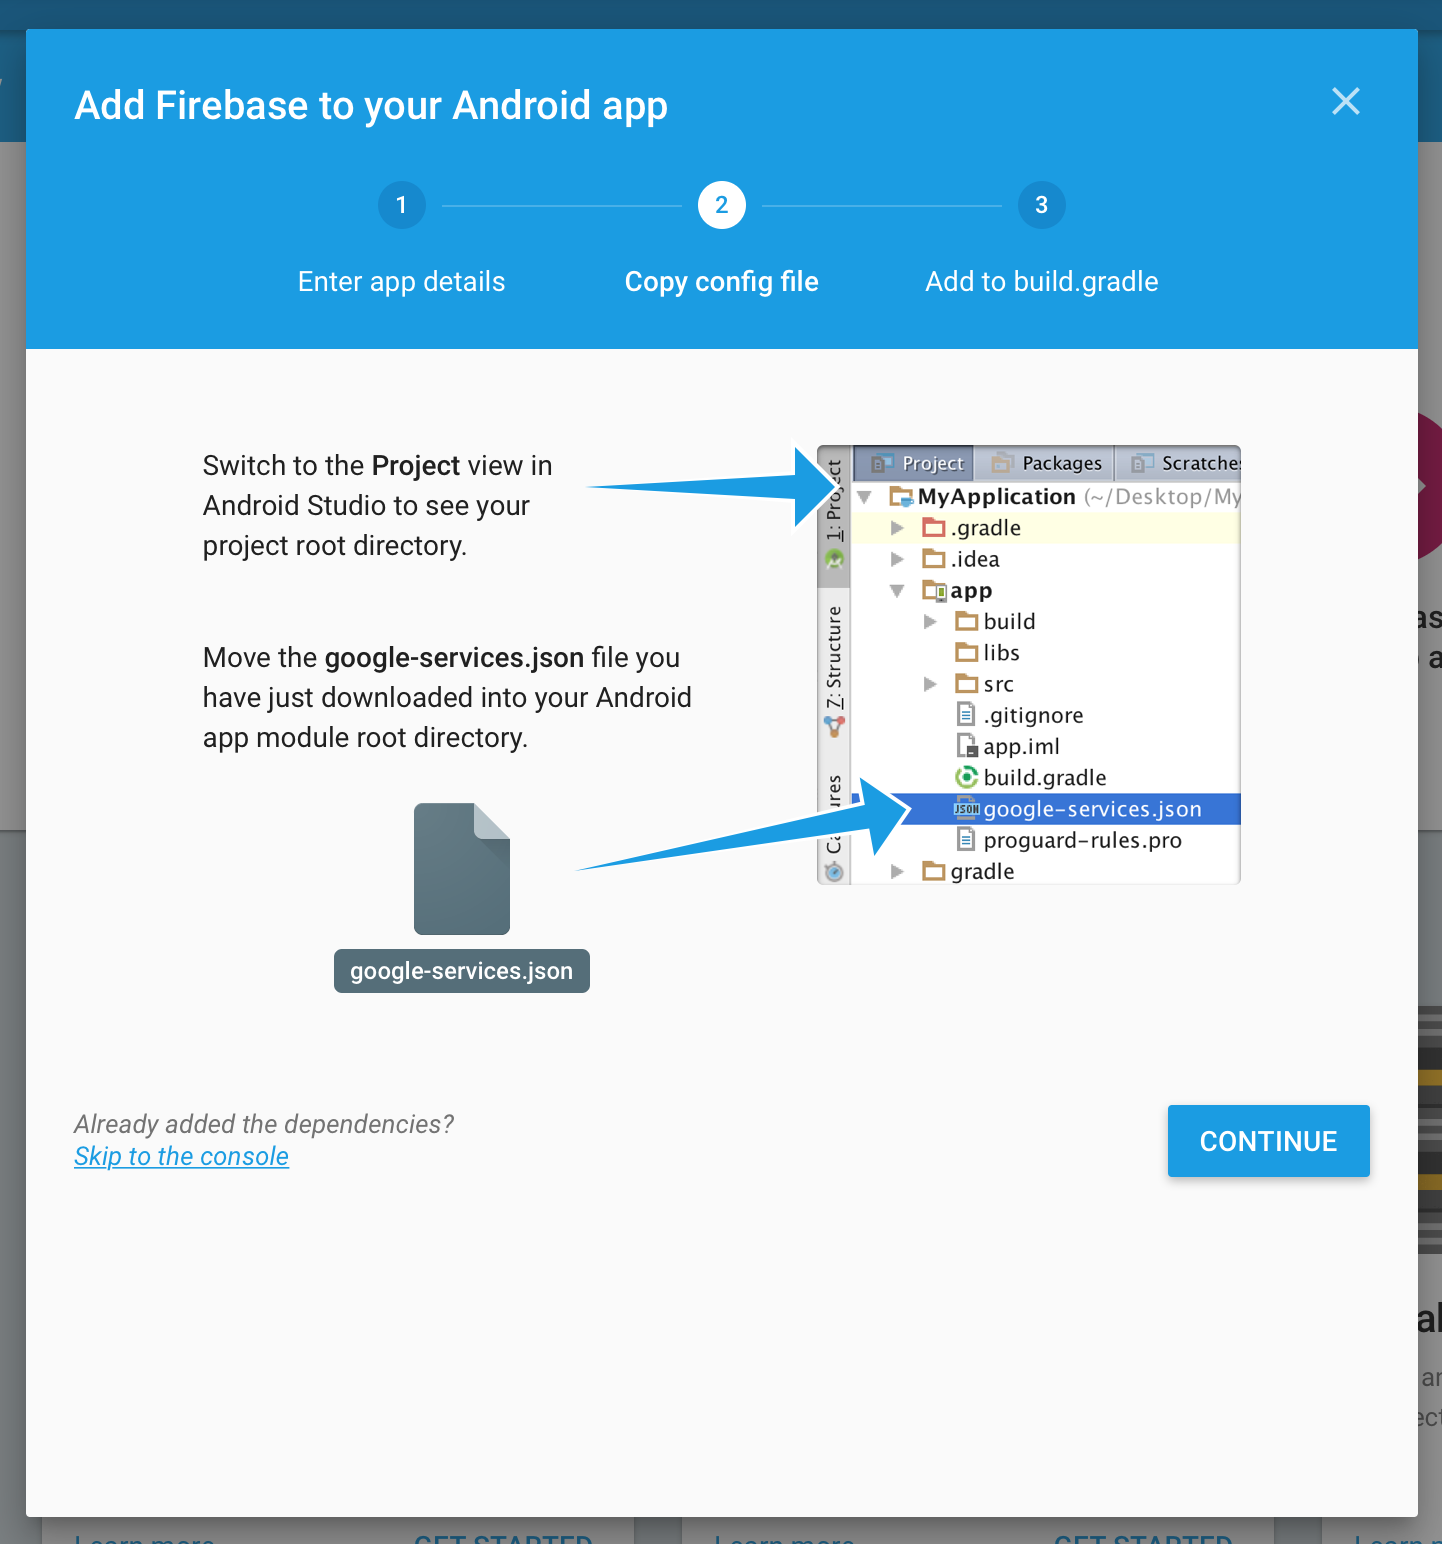
Save the google-services.json file and add it to your app so that it is placed inside the Assets folder in a ready .apk file. If you use Flash Builder IDE simply copy it in the root folder, Flash Builder will do the rest for you.
Implementation to app
Update Adobe Air SDK. Pay attention that version of the Adobe Air SDK should be at least 22.0, otherwise FCM classes will not be imported into your project. However, you still can use Analytics, but application will not be able to accept Push Notifications.
Add dependencies to your project. These libraries are located in the same archive with com.devtodev.SDK.ane extension in the dependencies folder. These extensions contain firebase, gps и android-support libraries Java, that are used for sending Push Notifications. If you have already imported firebase-auth, firebase-common, firebase-iid, firebase-messaging, play-services-auth, play-services-base, play-services-basement, support-v4 or they are included in other extensions, you don't need to import them again. In any case, we recommend to use data from the library of a version not lower than 25. Add the following to the manifest file of your app:
Add the following to your application's manifest:
Add the following imports to your source:
Add the push notifications initialization before the DevToDev.init(appKey:String, appSecret:String) method was called:
onPushToken, onPushTokenFailed, onPushReceived and onPushOpened are the functions that take following arguments:
Changing the application settings in devtodev system
1. Proceed to Setting -> PUSH NOTIFICATIONS:

2. Insert the previously received Server API Key to the API Key field in Push notifications section.

3. If the Server API Key is correct, you will see the following result

Creating a new push-notification in devtodev interface
Open PUSH NOTIFICATIONS section and click on 'Add new campaign' button
Fill in campaign name, select an app for delivery
Choose user group to send a message. You can choose existing segment or create a new one.
Enter notification details
Make some tests and correct the message if it's required
Schedule the delivery
That's it!
You can create a campaign only after at least one push token comes from devtodev SDK integrated to your application. Otherwise the app will not be displayed in the list.
iOS push-notifications
To enable Push Notifications, please perform the following actions:
Add the application to your space in devtodev system
Generate Developer or Production Certificate for the application and get Private key file (.p12) on its basis
Submit the data to the application settings in devtodev system
Integrate devtodev SDK to the application (see the “SDK integration” division to learn more about integrating and initializing devtodev SDK)
Add several lines of the code to switch in the push notification to the SDK
Create a campaign for sending push notifications in “Push” section
Certificate generation
Open "Keychain access" utility (Launchpad → Other) and choose "Request a Certificate From a Certificate Authority" option.
Fill in all requied fields in Certificate Assistant window, set flag an "Saved on disk" item and click "Continue". Save the file.
Log in at iOS Provisioning Portal. Open "App IDs" section, choose your app and click "Edit".
Activate "Push Notifications" option and click on "Create Certificate"
At first, you need to generate Certificate Signing Request. We have already done it, so you can just click "Continue".
At next step you need to upload the CSR to the Apple server. Choose the CSR-file and click "Generate".
Certificate generation takes just a few seconds. After generation is finished click "Download" and then "Done".
You'll need to repeat this process to generate the Production Certificate when your app will be ready for release. All steps are the same.
Convert iPhone developer certificate into a P12 file on Mac OS
Follow these steps to export the certificate from Apple web-site to the P12-file:
Open "Keychain access" application
If the certificate hasn't been added to keychain access yet, choose "File" → "Import". Find the certificate file (CER-file) provided by Apple
Choose "Keys" section in "Keychain access" application
Choose personal key associated with your iPhone developer certificate. Personal key is identified by open certificate associated with it "iPhone developer: ". Choose "File" → Export objects. Save key as .p12
You'll be suggested to create a password which is used when you need to import the key to another computer.
Convert iPhone developer certificate into a P12 file on Windows OS
Convert Apple certificate file to the PEM-file. Start the following command-line operation from bin catalog OpenSSL.
Convert personal key from Mac OS keychain to the PEM-key:
Now you are able to create P12-file using PEM-key and iPhone developer certificate:
If you are using key from Mac OS keychain than choose PEM-version created at previous step.
Otherwise you can use OpenSSL key for Windows OS.
Upload the certificate to the site
Upload the .p12-file into Integration section of application settings panel (Settings -> PUSH NOTIFICATIONS):

After the certificates has been generated you can start to integrate Push SDK into you app.
SDK Integration
Add the following to your application's manifest. Don't forget that the minimum supported version is iOS 7:
Attention! If you use Production Certificate for signing application package, don't forget to change "development" value to "production".
Add the following imports to your source:
Add the push notifications initialization before the DevToDev.init(appKey:String, appSecret:String) method was called:
onPushToken, onPushTokenFailed, onPushReceived and onPushOpened are the functions that take following arguments:
Compile and run the app. You will need a device, because simulator does not support push notifications.
Xcode will automatically choose new provisioning profile. If an error occurred during the launch make sure that there is a correct profile set in the Code Signing Identity. You'll be asked to confirm push notifications. An app will request permission only once, if user confirm it - notifications will be accepted otherwise he wont get any push messages from your app. User can change it in device settings.
Creating a new push notification in devtodev interface
1. Open PUSH NOTIFICATIONS section and click on "Add new campaign" button.

2. Fill in campaign name
You can create a campaign only after at least one push token comes from devtodev SDK integrated to your application. Otherwise the app will not be displayed in the list.

3. Choose user group to send a message. You can choose existing segment or create a new one.

4. Enter notification details

5. Test push notification (or skip this step)

6. Confirm push gateway

7. Schedule the delivery

8. That's it!
Last updated
Was this helpful?
